Setting Up
Introduction
In order to get your Cloudless App developed and running, some housekeeping with respect to both development and payment environments are required.
Fluence Cloudless offers you, the developer, a great degree of control over almost every aspect of your Cloudless App:
- which data center(s) host you cloudless code, e.g., geo-location or carbon footprint requirements
- what capacity capabilities execute your functions, e.g., CPU and RAM type
- what level of resources you want to power your functions, e.g., number of CPUs
- what level of availability you want for your Cloudless App.
Moreover, in Fluence's "verify, don't trust" paradigm, providers have to submit cryptographic proofs attesting to the correct execution of your Cloudless Functions in order to be able to collect the pre-agreed price for their compute services rendered. Hence, the underlying billing and payment models also are different.
Instead of a credit card on file that is (for the most part) charged at the end of the month for compute service charges incurred over the billing period, e.g., the last calendar month, as reported by the cloud provider, Fluence Cloudless operates on a pre-payment and token model putting you, the developer, fully into control of your payments.
Fluence Networks
In order to create and operate your Cloudless App, you need to interact with two different networks: the Fluence Compute Network and the Fluence Compute Marketplace. The Fluence Compute Network is a peer-to-peer network connecting peers, i.e., servers in various data centers, hosting and executing your Cloudless Deployments on demand. The Fluence Compute Marketplace is a blockchain hosting the necessary smart contracts to allow you to commit your developer offer for matching with provider offers and to manage the proof-based charges from each peer owner, i.e., provider, running your Cloudless Deployments. Each network is available in a production, i.e., mainnet, or testing, i.e., testnet, flavor. In addition, the remote testnets can be stood-up locally to further ease development.
Table 1: Network Names
| Compute Network | Marketplace Network | |
|---|---|---|
| testnet | dar | TBD |
| mainnet | kras | TBD |
| local | dar | TBD |
Testnet deployments require the same token types than the mainnet except that those tokens have no trading value and are freely available in small quantities to cloudless developers from the testnet faucet, i.e., a web app that facilitates the distribution of free tokens. In the case of the Fluence testnet. Again, both tFLT and tUSDC carry no trading value and are freely available to developers in small but sufficient quantities to develop and test their Cloudless Apps.
For details concerning the operation of a local network, see Working With A Local Network.
Setting Up For Payment
In order to handle tokens, testnet or otherwise, you need a crypto wallet. If you are unfamiliar with crypto wallets, have a look at this introduction but DuckDuckGo is your friend. Note that you will be storing ERC 20 type tokens and interacting with an EVM-compatible blockchain. That is, select a wallet that is compatible with the Ethereum Virtual Machine. For illustrative purposes, we'll be using MetaMask. Moreover, we will primarily focus on testnet deployments. A guide for migrating your Cloudless App to mainnet is coming soon.
Assuming you have your wallet ready to go, you need to add the testnet and testnet tokens tFLT and tUSDC, respectively, request test tokens from the Fluence faucet.
Creating And Funding Your Wallet
It is recommended to use a dedicated development account for your testnet. That is, create a new account in your wallet and name it, say, Fluence DAR Testnet and use this account only to manage your testnet tokens and chain interactions.
In your wallet, you need to create a network entry for the Fluence IPC dar testnet. Use the following parameters:
json
json
Once you got the network set, it's time to visit the faucet and request our token allocation. You can find all relevant support urls for the dar testnet here.
Requesting Test Tokens From The Faucet
Now that your account and wallet are setup, select the Fluence network you just added and grab the account address you want to use to hold your testnet tokens. Go to the Fluence dar testnet faucet, which prompts you to sign in with an email address. Shortly after submitting your email address, you will receive an email from Faucet. Make sure to check your spam folder. Copy the code into the open field and submit. At this point, you should see a screen similar to this:
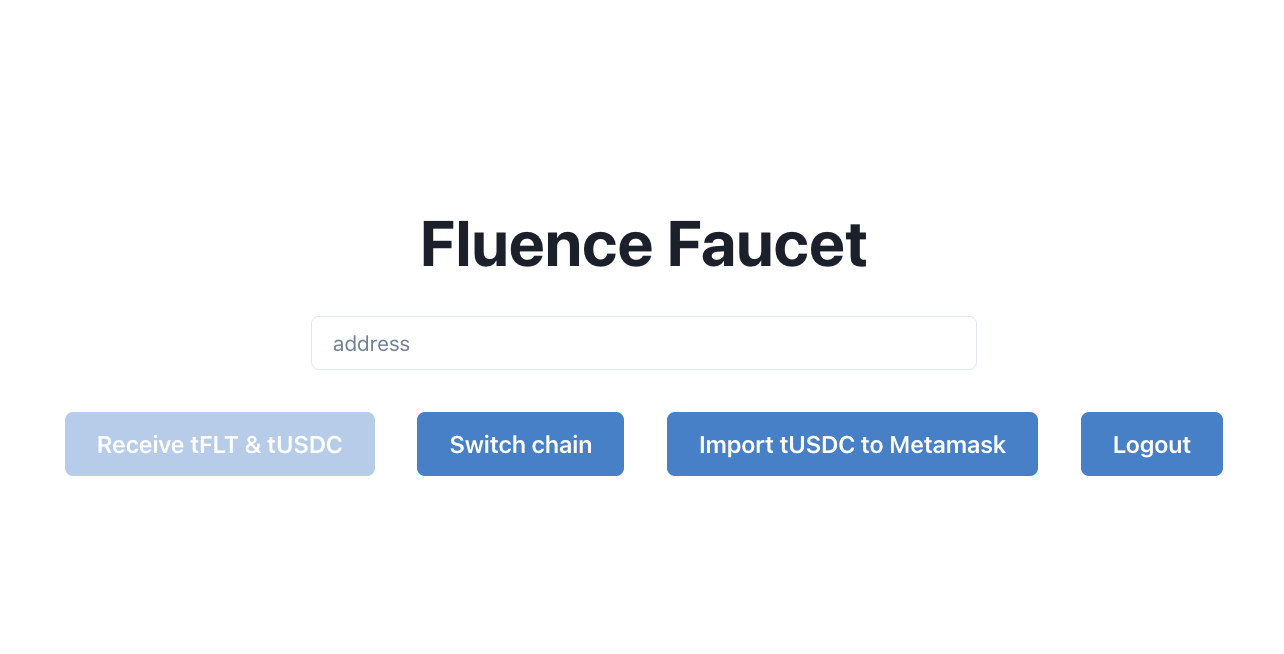
Enter the address of your wallet and, if you are using MetaMask, ask for the tUSDC token symbol to be imported. Then click the "Receive FLT & tUSDC" button. After a short delay, you should see a transaction id and the funds should be in your account.
You are now equipped to pay for your Cloudless Deployment on the Fluence testnet!