Fluence Bridge Application User Guide
Introduction
Fluence is a Layer 2 (L2) network bridging to Ethereum. To participate in the Fluence Network, you must first transfer your funds from Ethereum to the Fluence Network, which is done with the Fluence blockchain Bridge Application. This guide will walk you through using the Application and show you how to move your assets between Ethereum and Fluence.
Key concepts
Fluence Network uses an Optimistic Rollup system:
- Optimistic Rollup: A scaling solution that assumes all transactions are valid unless proven otherwise. This approach allows for faster processing but requires a security mechanism called "fraud proofs."
- Challenge Period: When withdrawing funds from Fluence to Ethereum, there's a 7-day waiting period. This period allows enough time for any potentially fraudulent transactions to be identified and disputed.
The transfer times vary for deposit and withdrawal operations:
- Deposits (Ethereum to Fluence): Take up to 15 minutes to provide the maximum security for your transactions.
- Withdrawals (Fluence to Ethereum): Take seven days due to the challenge period, ensuring maximum security for your funds. When the challenge period ends, you can claim your funds in the Bridge App.
Supported tokens
Currently, the Fluence Bridge supports two types of ERC20 tokens:
- FLT (Fluence Token): The primary Fluence token, used to reward Providers and Stakers for Capacity Commitment Proofs and gas payments in the Fluence Network.
- USDC (USD Coin): Used as a payment token for renting compute resources from Compute Providers by users.
Fee Structure for Cross-Chain Transfers
You can transfer both tokens (FLT and USDC) between Ethereum and the Fluence Networks in either direction. However, it's essential to understand the fee structure for these transfers.
Ethereum to Fluence Transfers
When moving funds from Ethereum to Fluence, you'll need to pay transaction fees in two currencies simultaneously:
- ETH: for the Ethereum network fees
- FLT: for the transaction fees on the Fluence network
Fluence to Ethereum Transfers
When moving funds from Fluence to Ethereum, you'll need to pay transaction fees in two currencies separately:
- FLT: for the Fluence Network fees when you initiate the withdrawal
- ETH: for the Ethereum Network fees when you claim the withdrawal after the challenge period
Prepare your wallet
You'll first need to connect a compatible crypto wallet to use the Bridge Application.
Read the comprehensive guide on using crypto wallets with Fluence web applications.
To ensure your wallet is ready for the Bridge application, verify the following:
- Your wallet is compatible with Fluence authentication methods
- You've added the Fluence Network to your wallet's list of networks
- You've imported the FLT token, and it's visible in your wallet's token list
Once you've ensured that your wallet can interact with the Fluence Network and obtained tokens for bridging, you can use the Bridge application to deposit tokens from Ethereum to Fluence and withdraw tokens from Fluence to Ethereum.
MetaMask is used as the wallet for the examples and demonstrations, but the actions shown are similar to most crypto wallets.
The Bridge App guide
Overview
You can find the link to the Bridge in the navigation bar of the Staker application, "Bridge" section, or use the official link:
Be cautious and use only the official Bridge Application at https://bridge.fluence.network. Never share your private keys or seed phrases with anyone, and always double-check the URL before signing the transactions.
 The view of the Bridge Application main page
The Bridge application consists of the following parts:
- Authentication button (top right corner):
- For unauthenticated users: "Connect" button for logging in with a crypto wallet
- For authenticated users: a panel displaying your wallet address and icons to log out
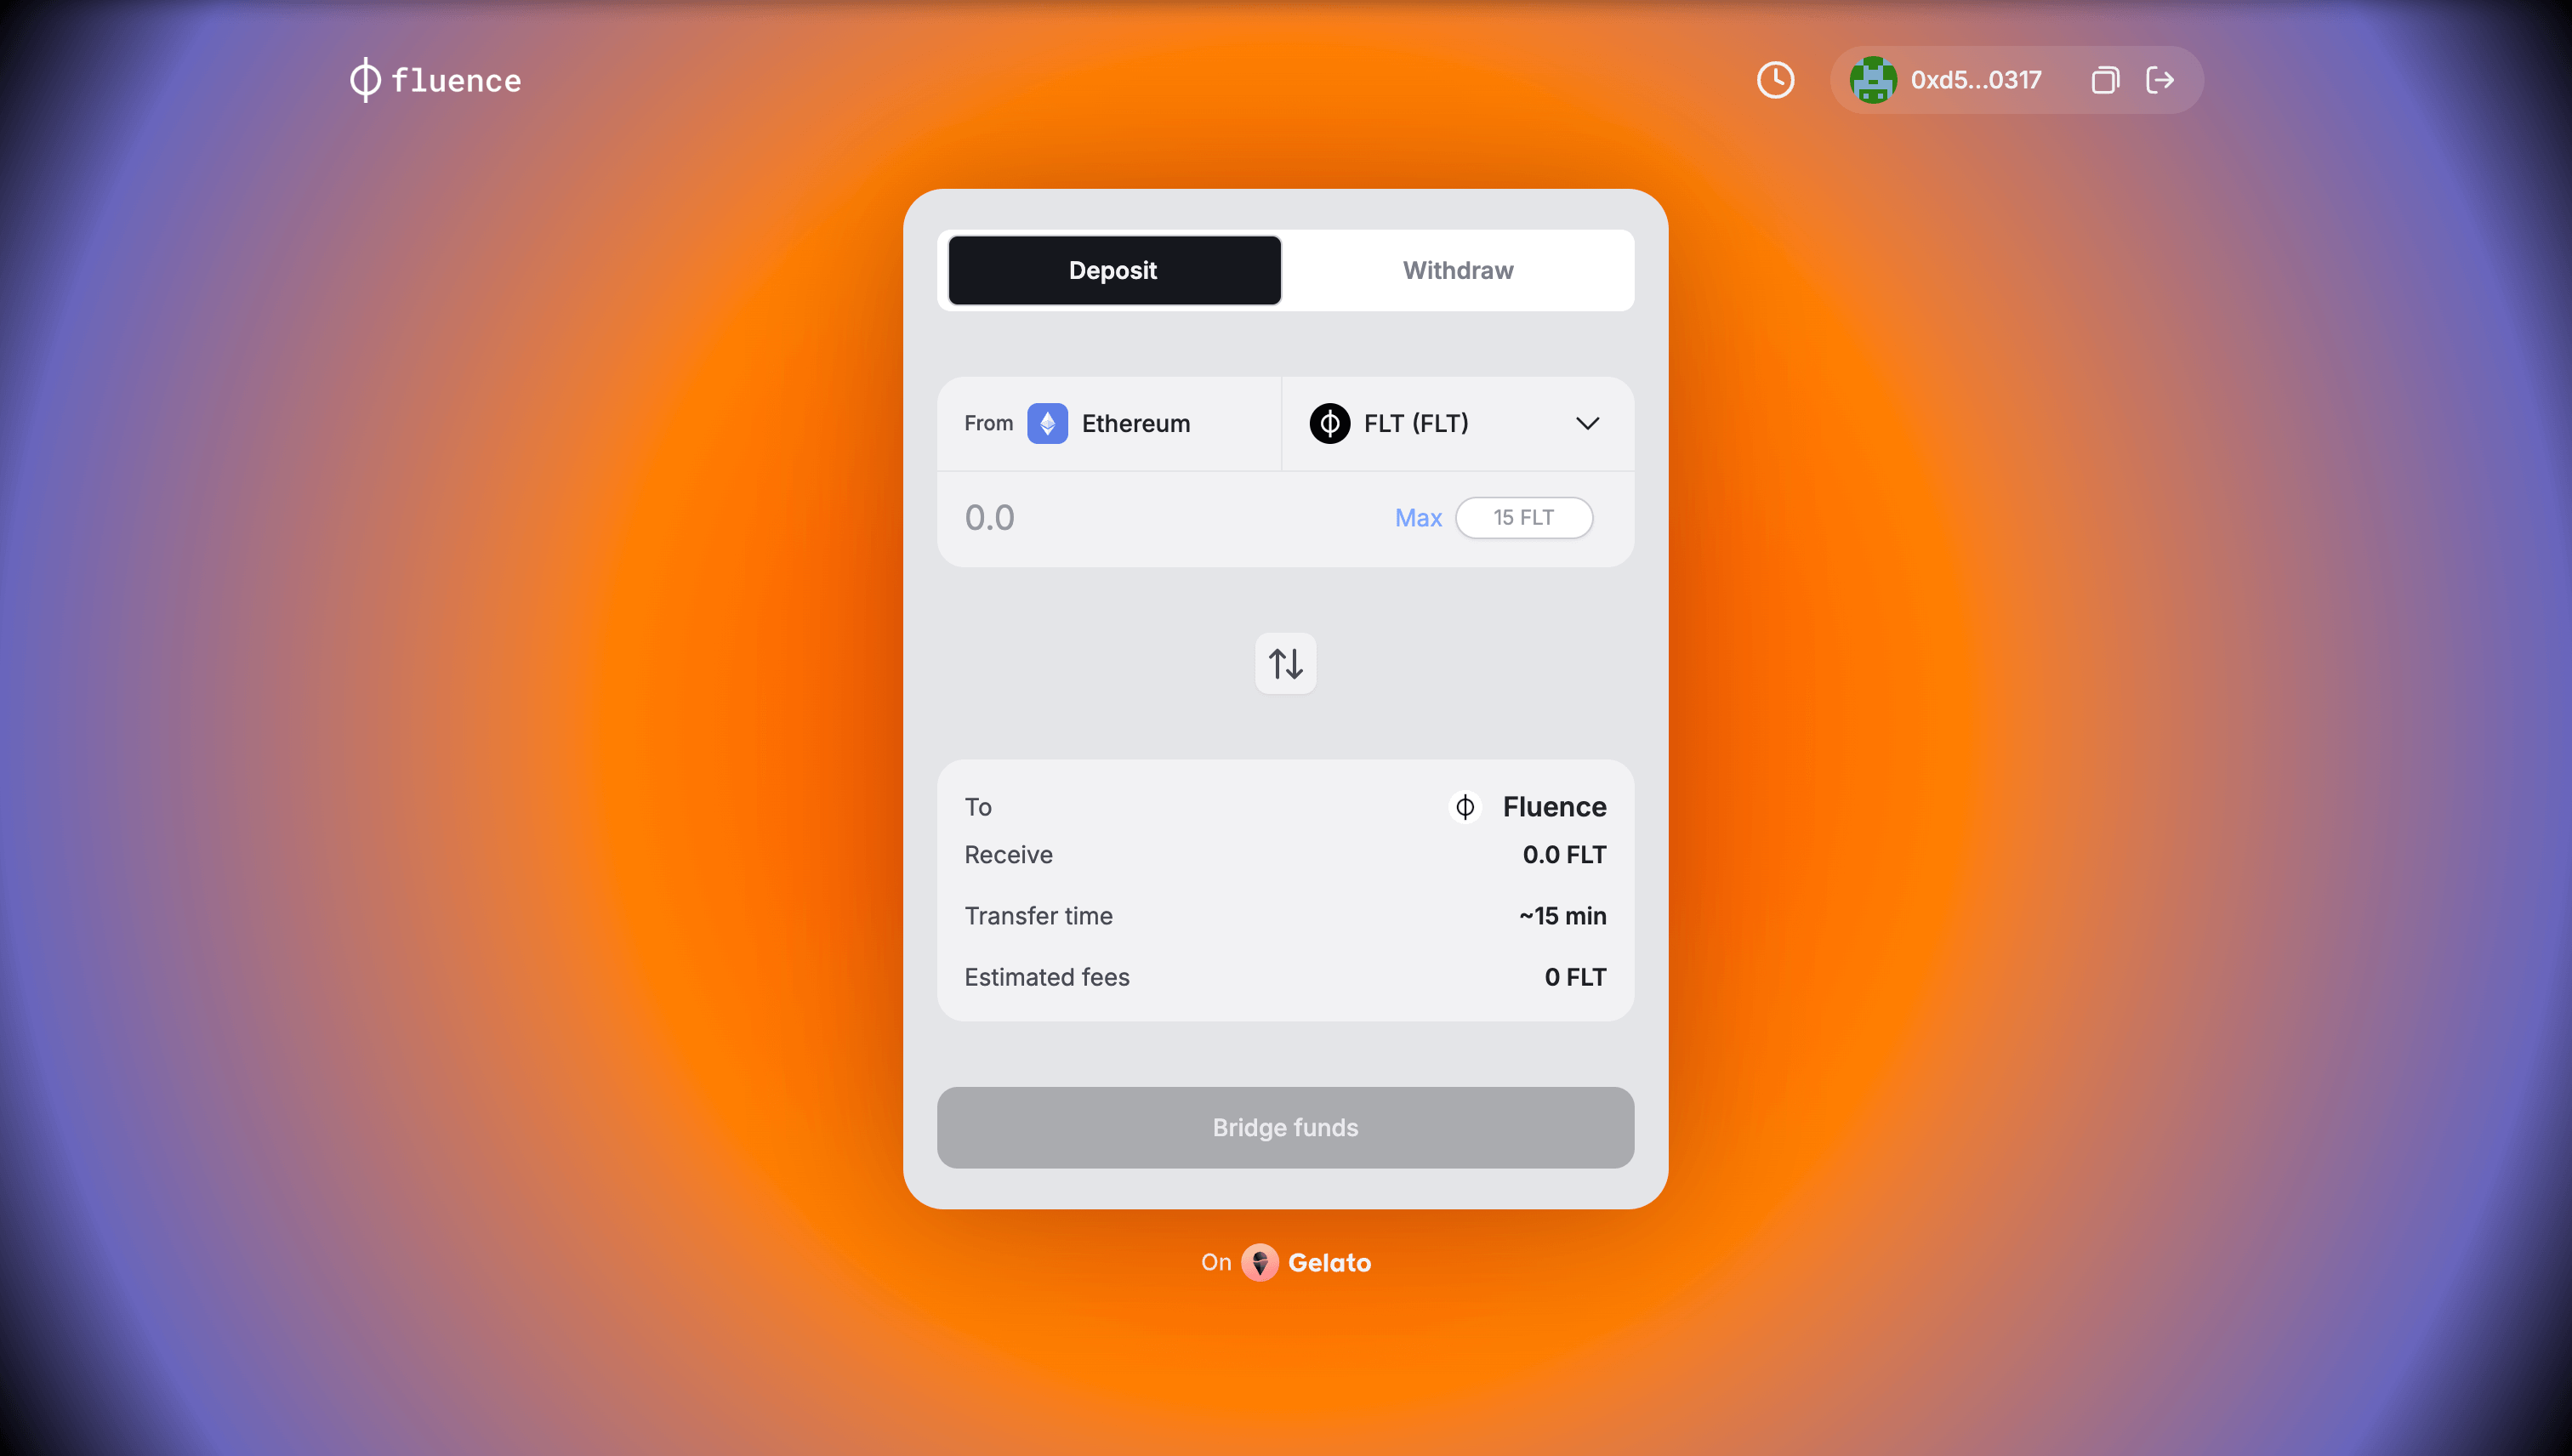
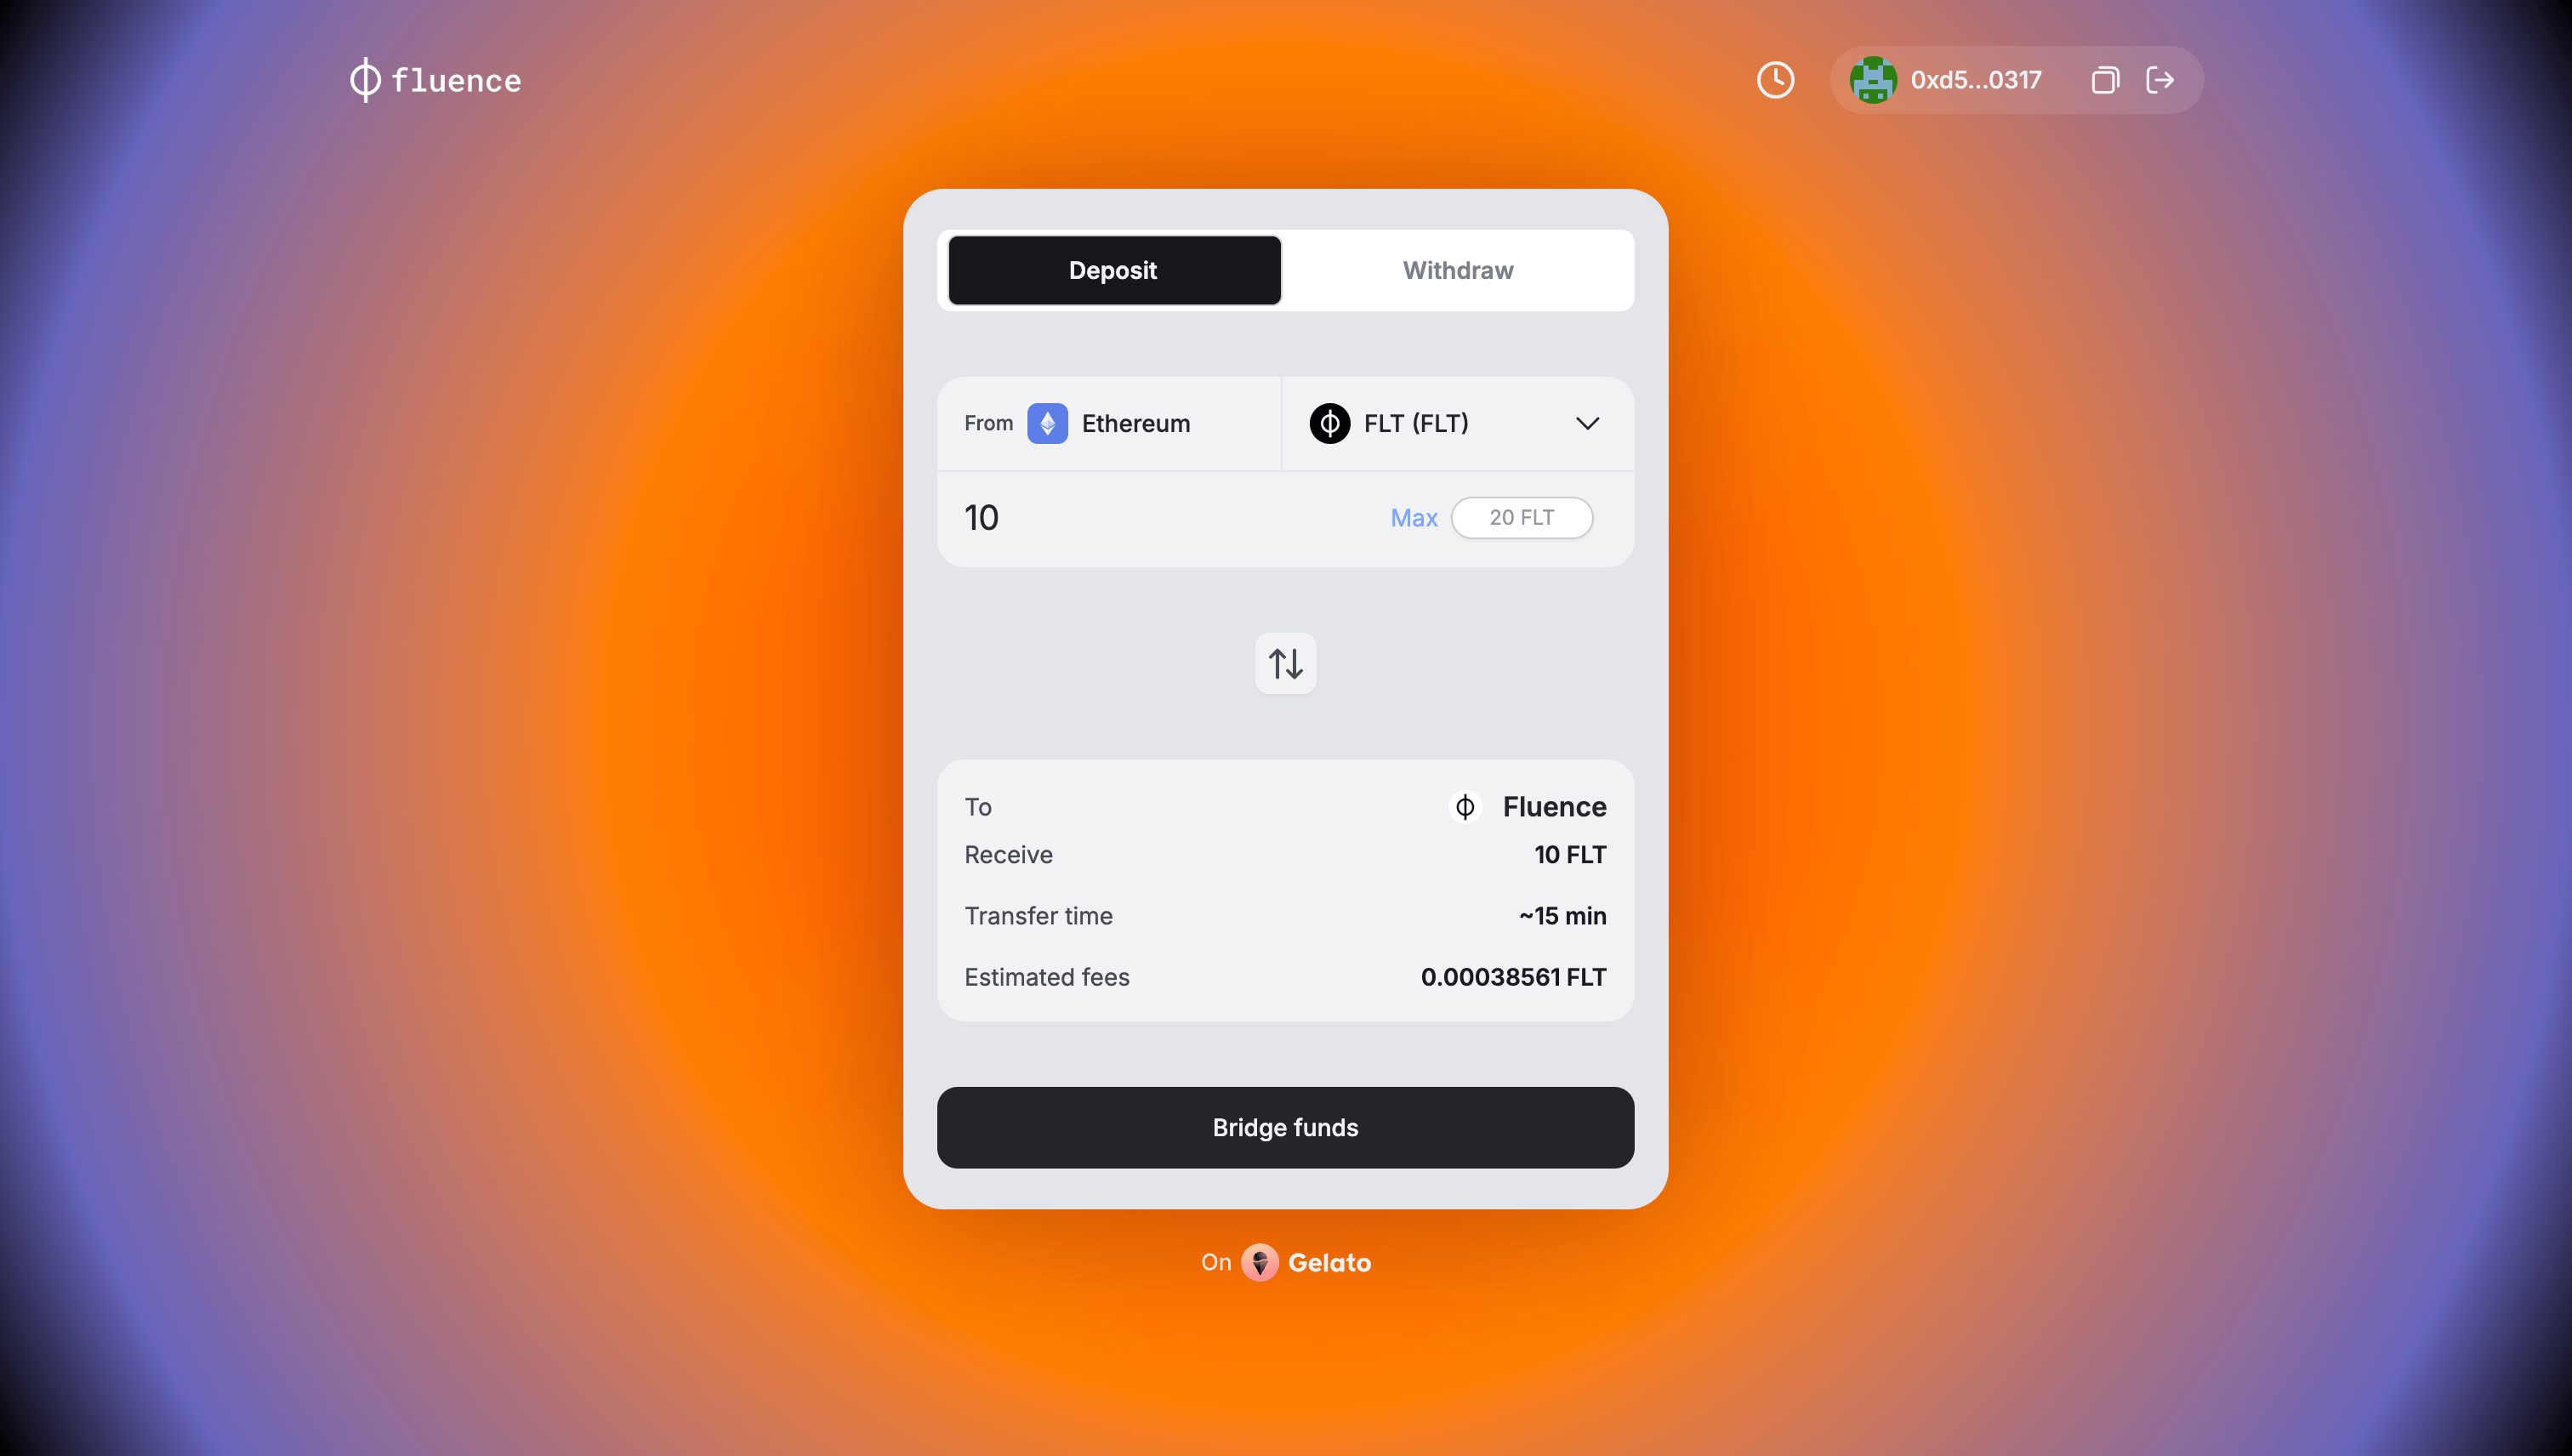
- The main control panel (in the center) with two options:
- Deposit tab: Transfer tokens from the Ethereum Network to the Fluence Network
- Withdraw tab: Transfer tokens from the Fluence Network to the Ethereum Network
- History (only for authenticated users): The time face icon to the left of the auth panel. Displays a record of your prior withdrawals from Fluence to Ethereum. Refer to the Withdrawals history page section below for more details.
To start using the Bridge application, you must first authenticate by connecting your crypto wallet to the application. To do so, press the button at the top right corner and select your preferred wallet.
Let's start by exploring how to deposit tokens from Ethereum to Fluence — a quick and straightforward process.
Depositing Tokens (Ethereum to Fluence)
To bridge tokens from the Ethereum Network to the Fluence (L2) Network:
-
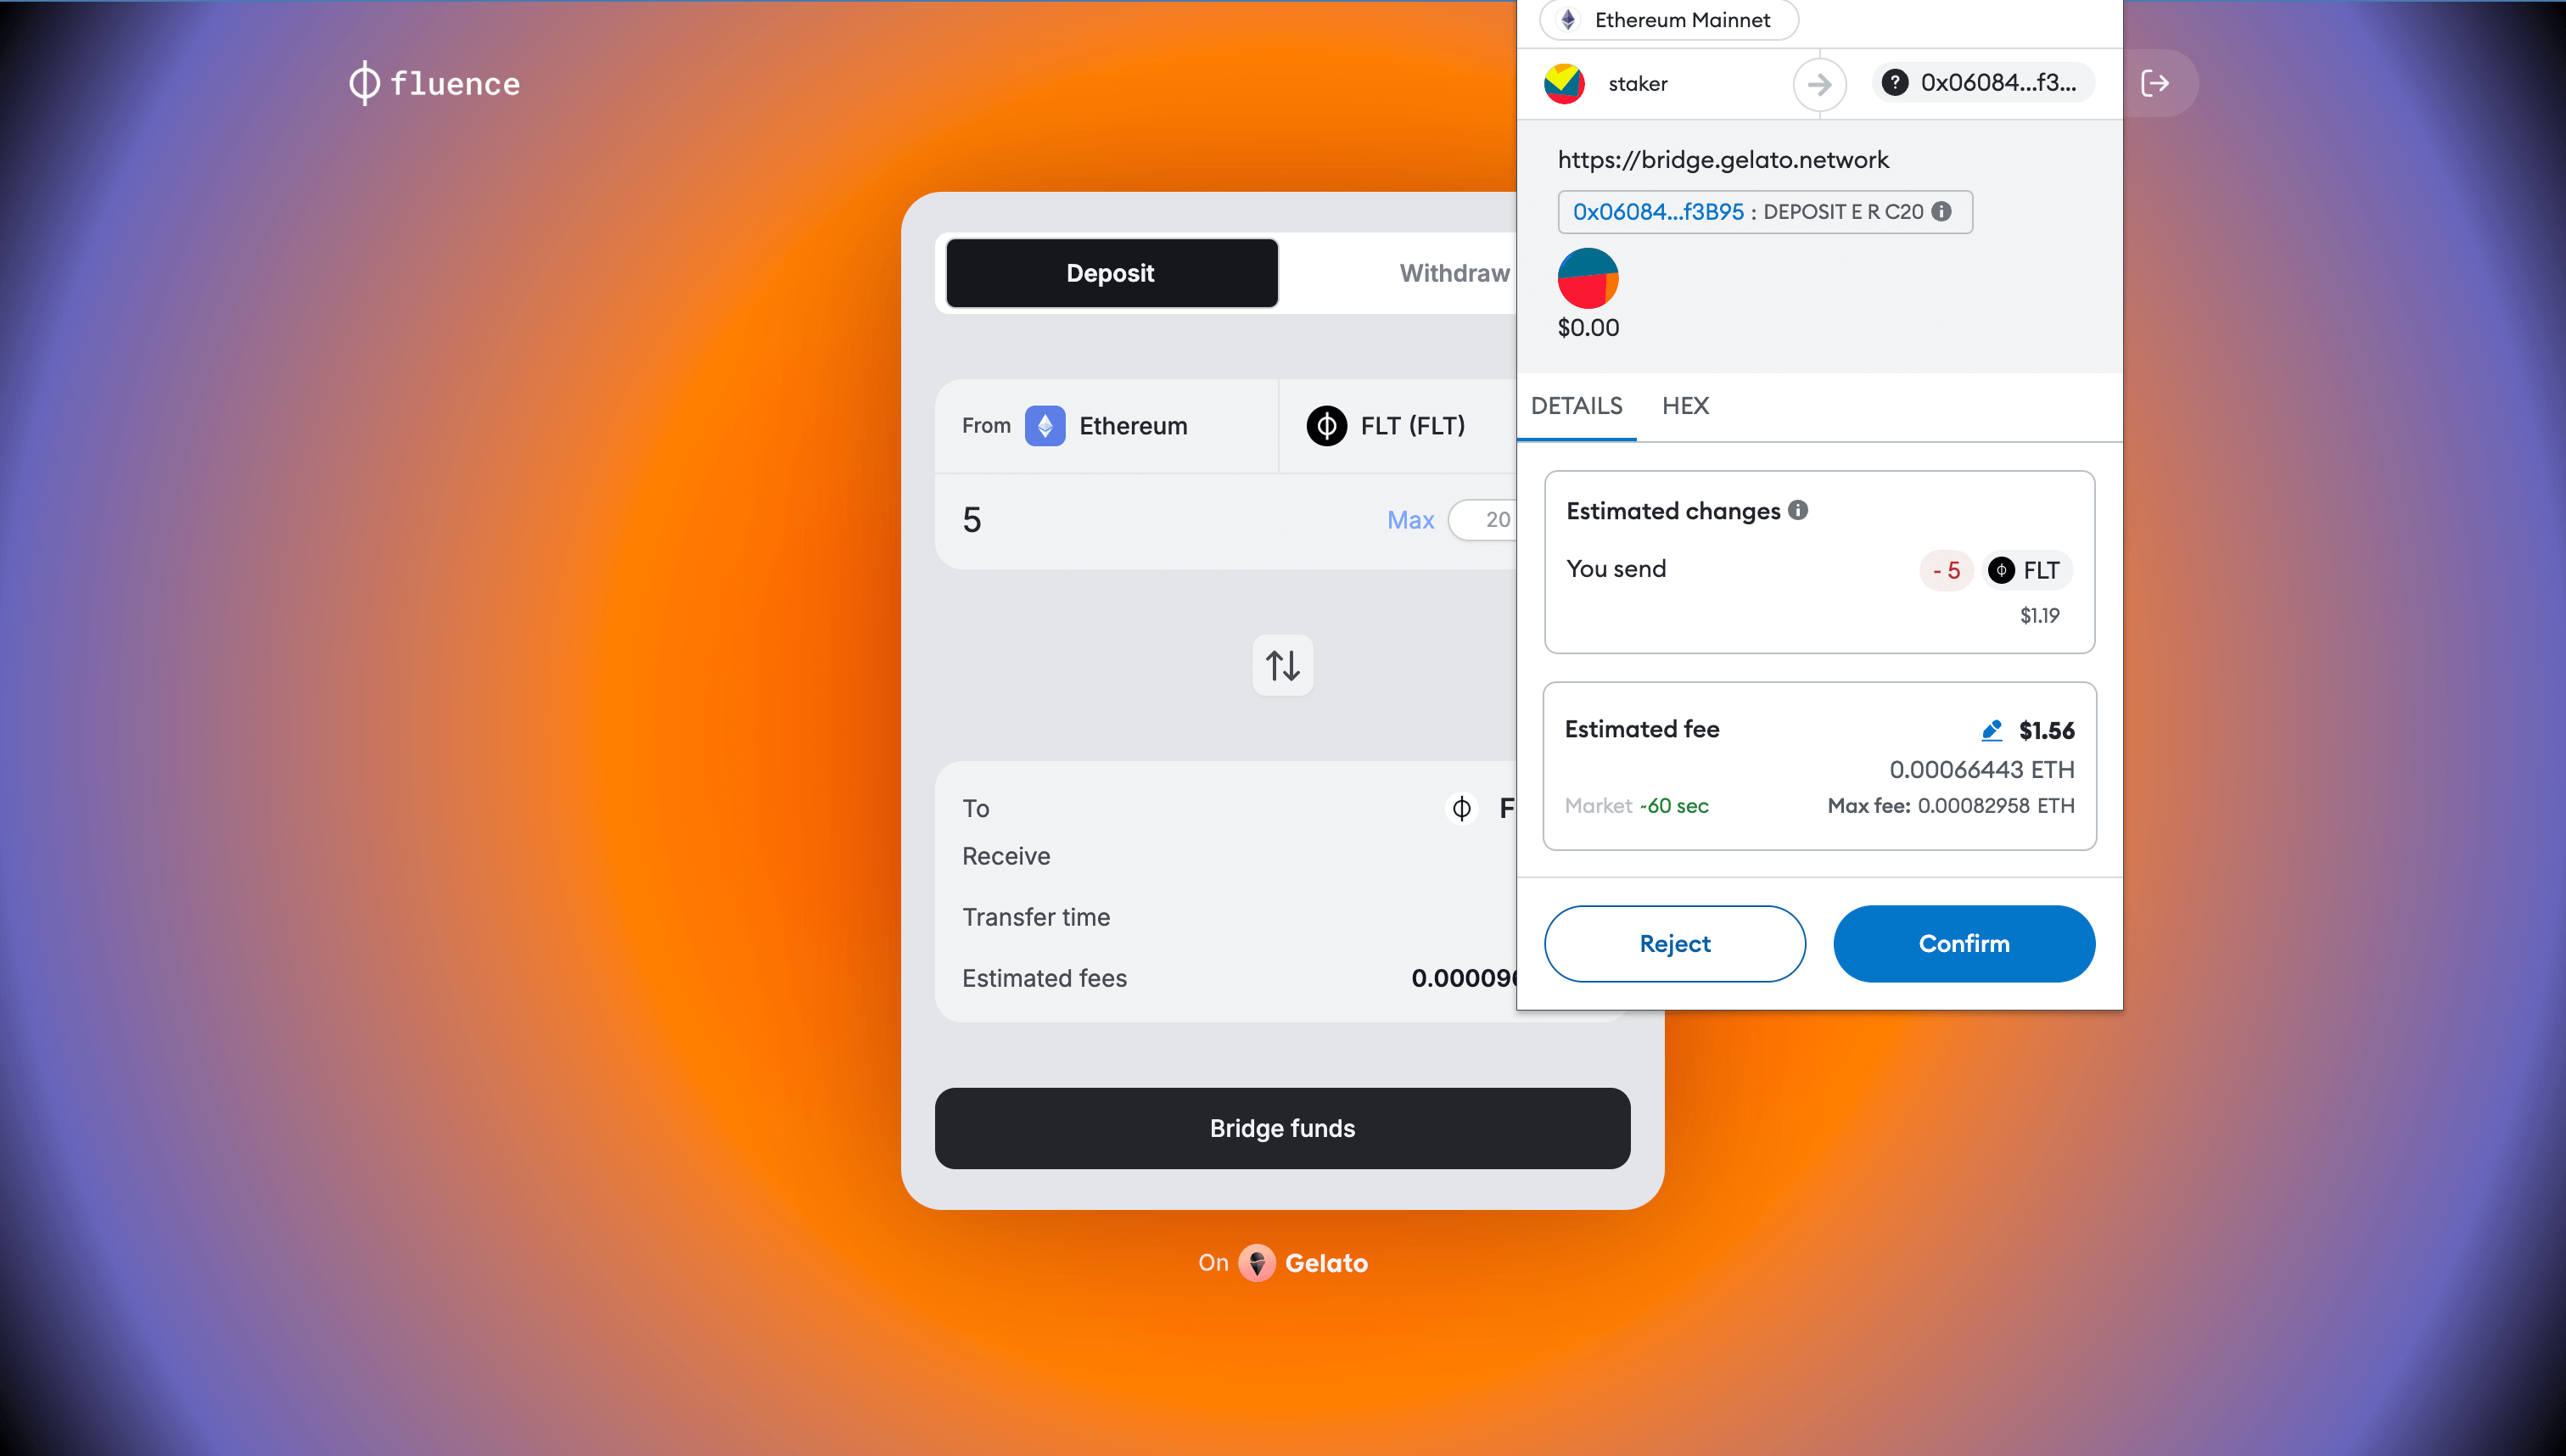
Select the "Deposit" tab in the main panel of the bridge application.
-
Choose the token (FLT or USDC) you want to bridge. In this example, we're bridging FLT tokens.
-
Enter the number of tokens you wish to bridge.
-
Verify that the correct amount is displayed in the bridge panel and that you have enough FLT tokens in your wallet to cover the transaction fee specified in the "Estimated fees" field.
-
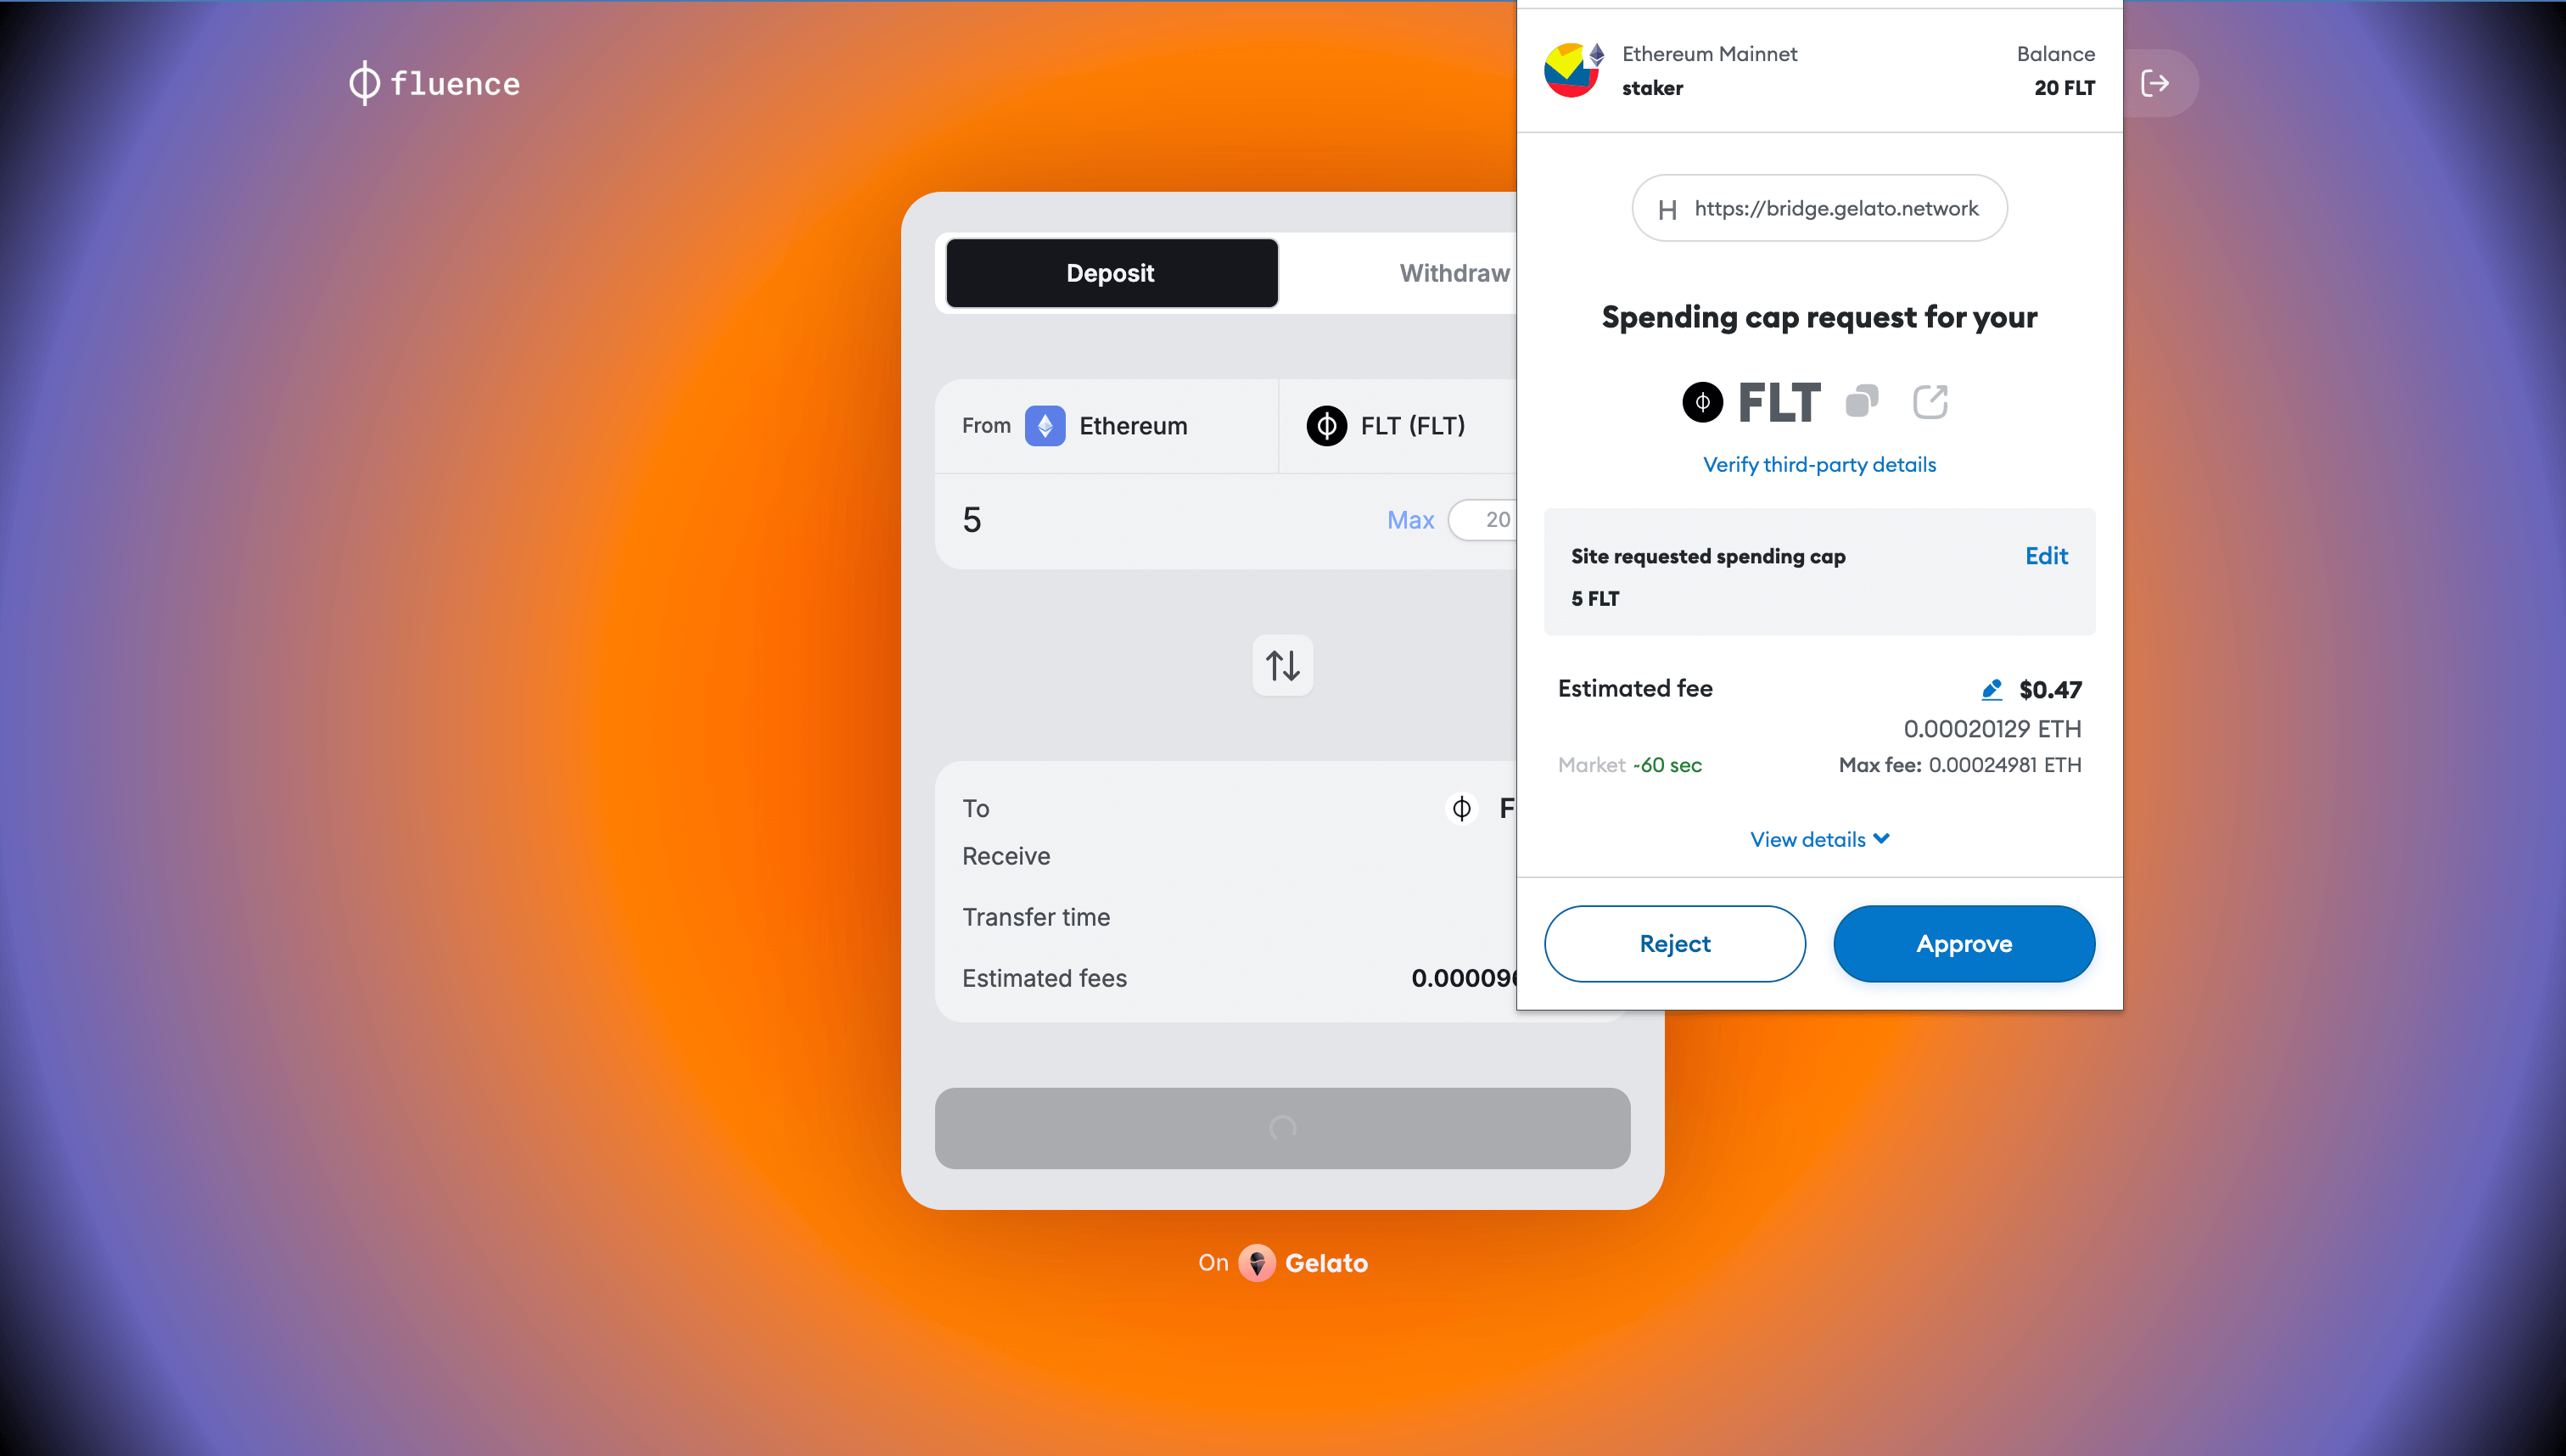
Click the "Bridge Funds" button.
-
Your wallet application will ask you to sign several transactions:
-
Allow the bridge app to send the amount of tokens you specified. Ensure that the spending cap corresponds to the actual amount and confirm the transaction
-
To initiate bridging
-
-
After the transaction is processed, you'll be redirected to the Bridge application, where you'll see a status message:
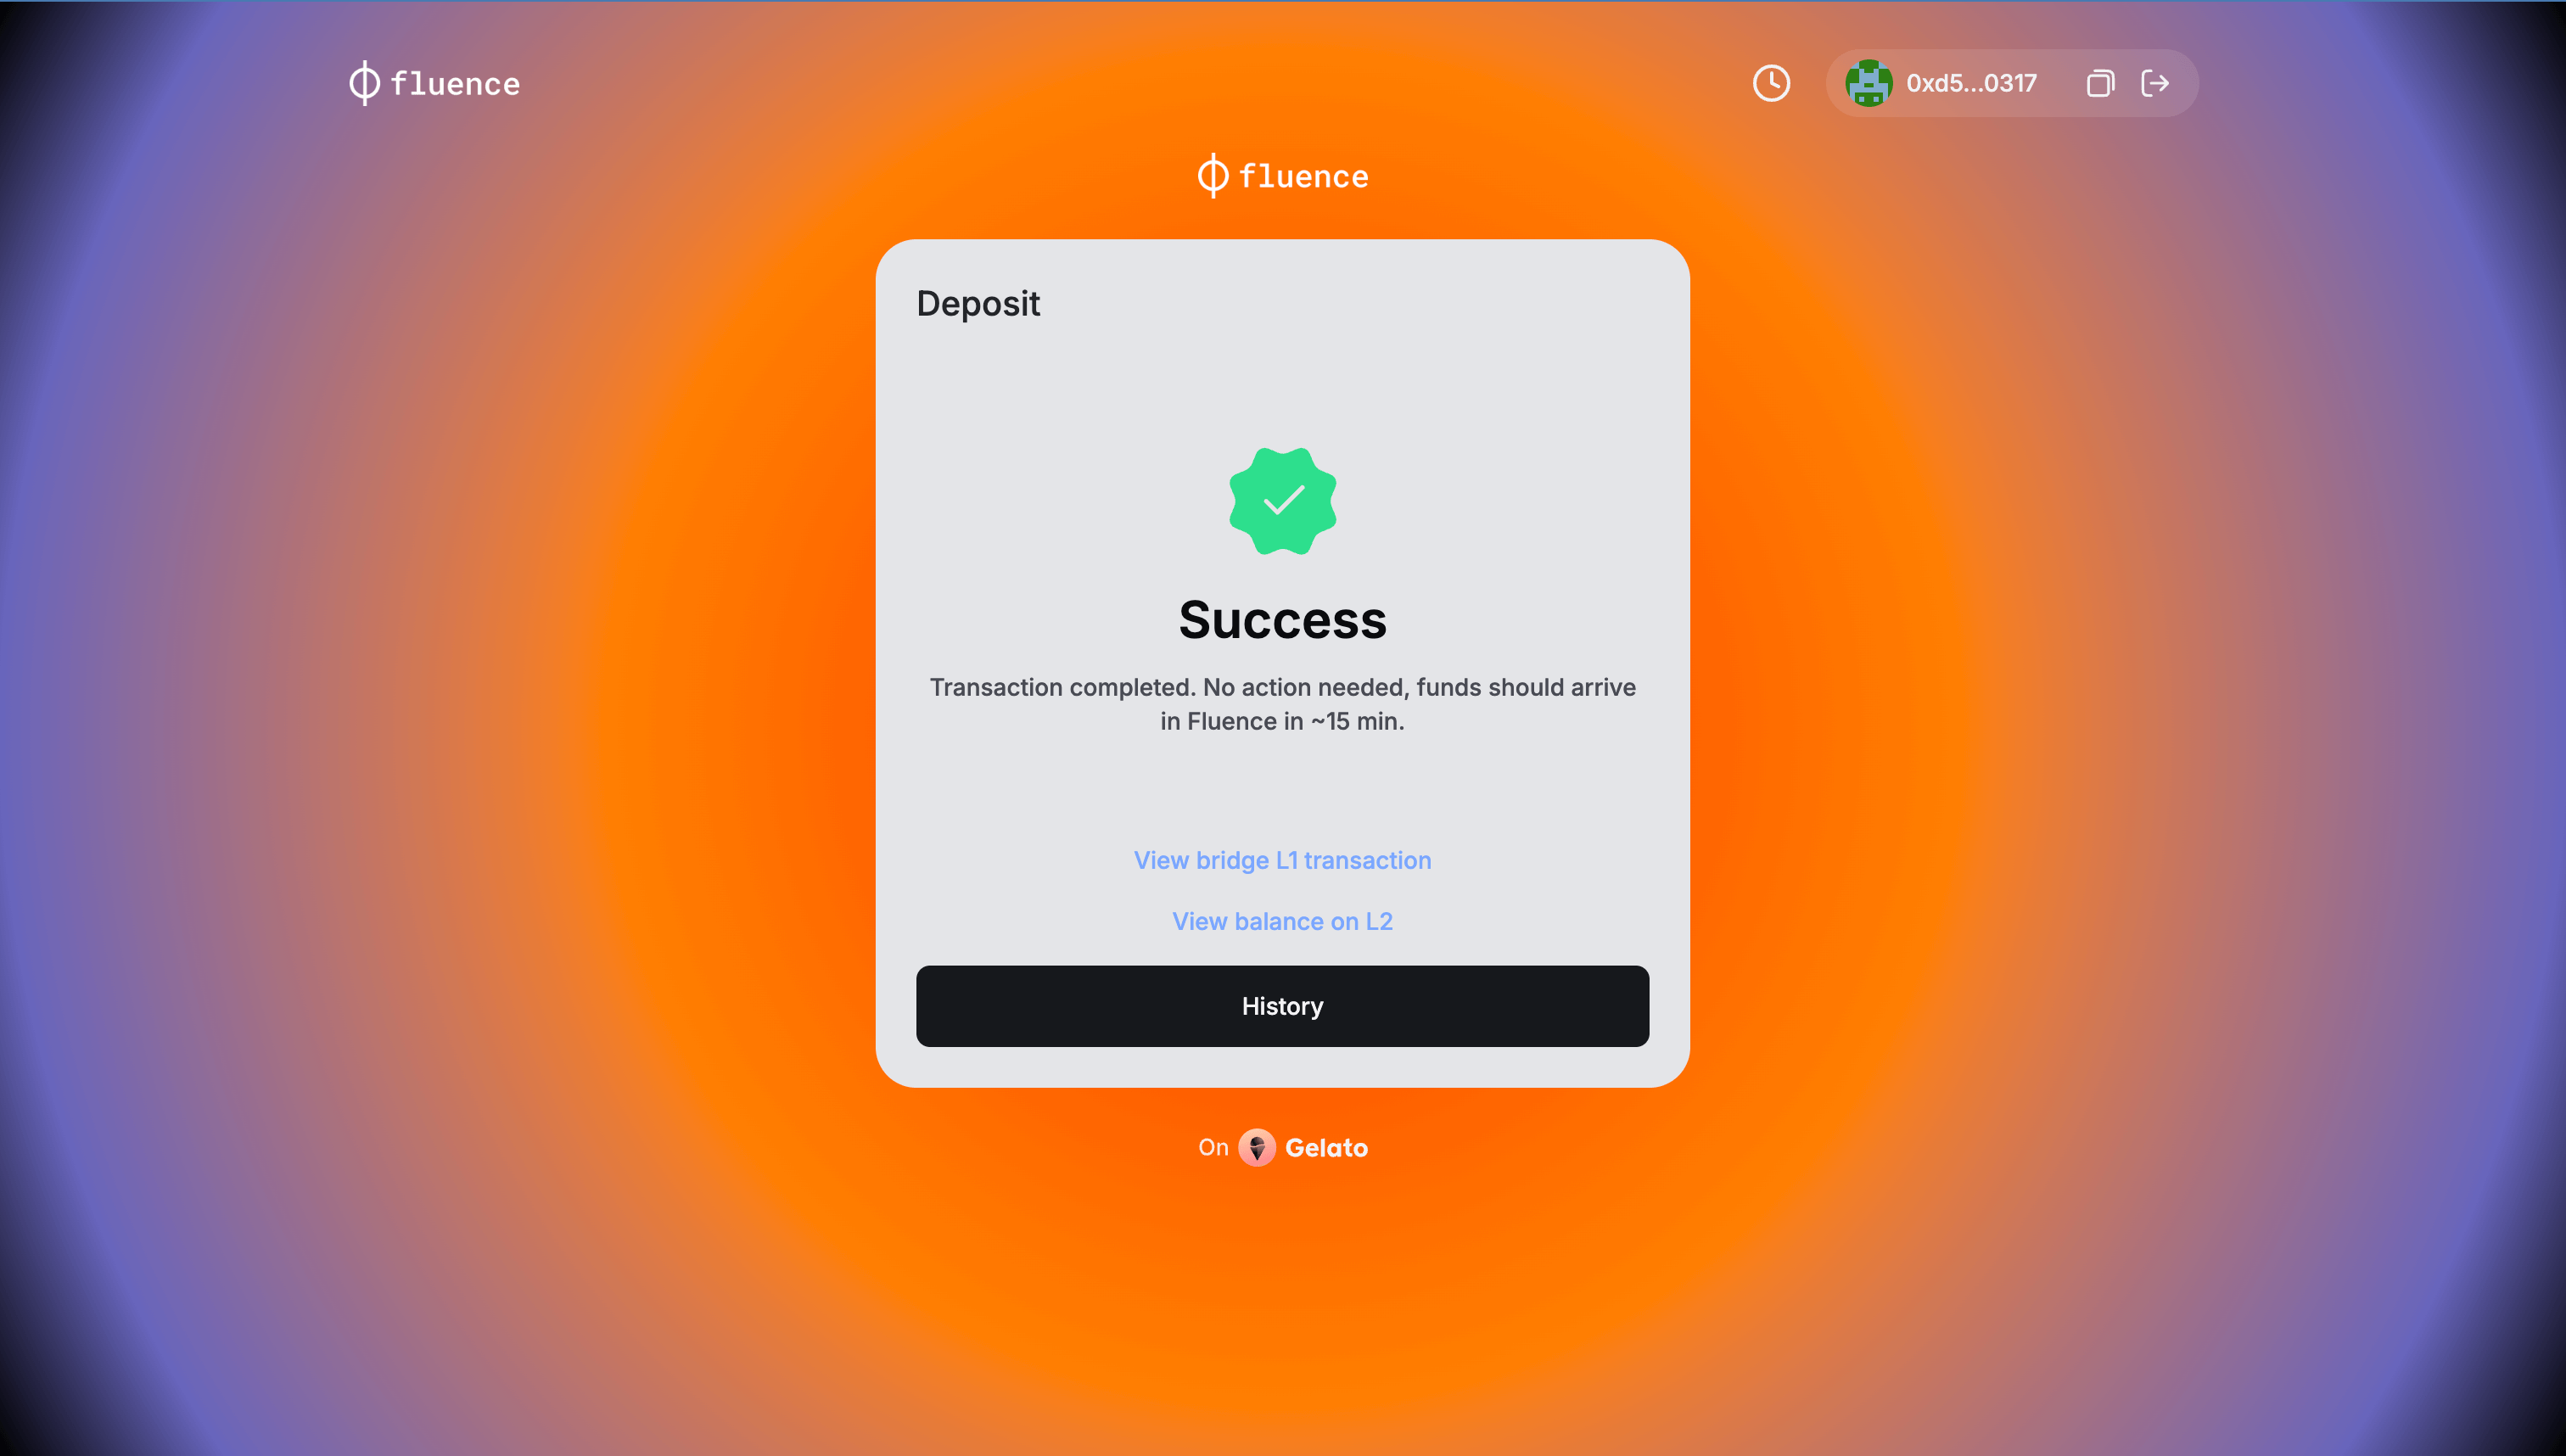 For successful transactions, you'll receive two important links:
- A link to the L1 bridge transaction details on Etherscan.
- A link to the L2 network transaction details on Blockscout, the Fluence network block explorer.
noteBridging from the Ethereum Mainnet to the Fluence network takes approximately 15 minutes, which is sufficient to ensure a high level of security.
-
Once your tokens are bridged to the Fluence network, the token transfer transaction can be viewed on Blockscout. Simply enter your wallet address in the placeholder at the end of this URL: https://blockscout.mainnet.fluence.dev/address/
<YOUR_WALLET_ADDRESS>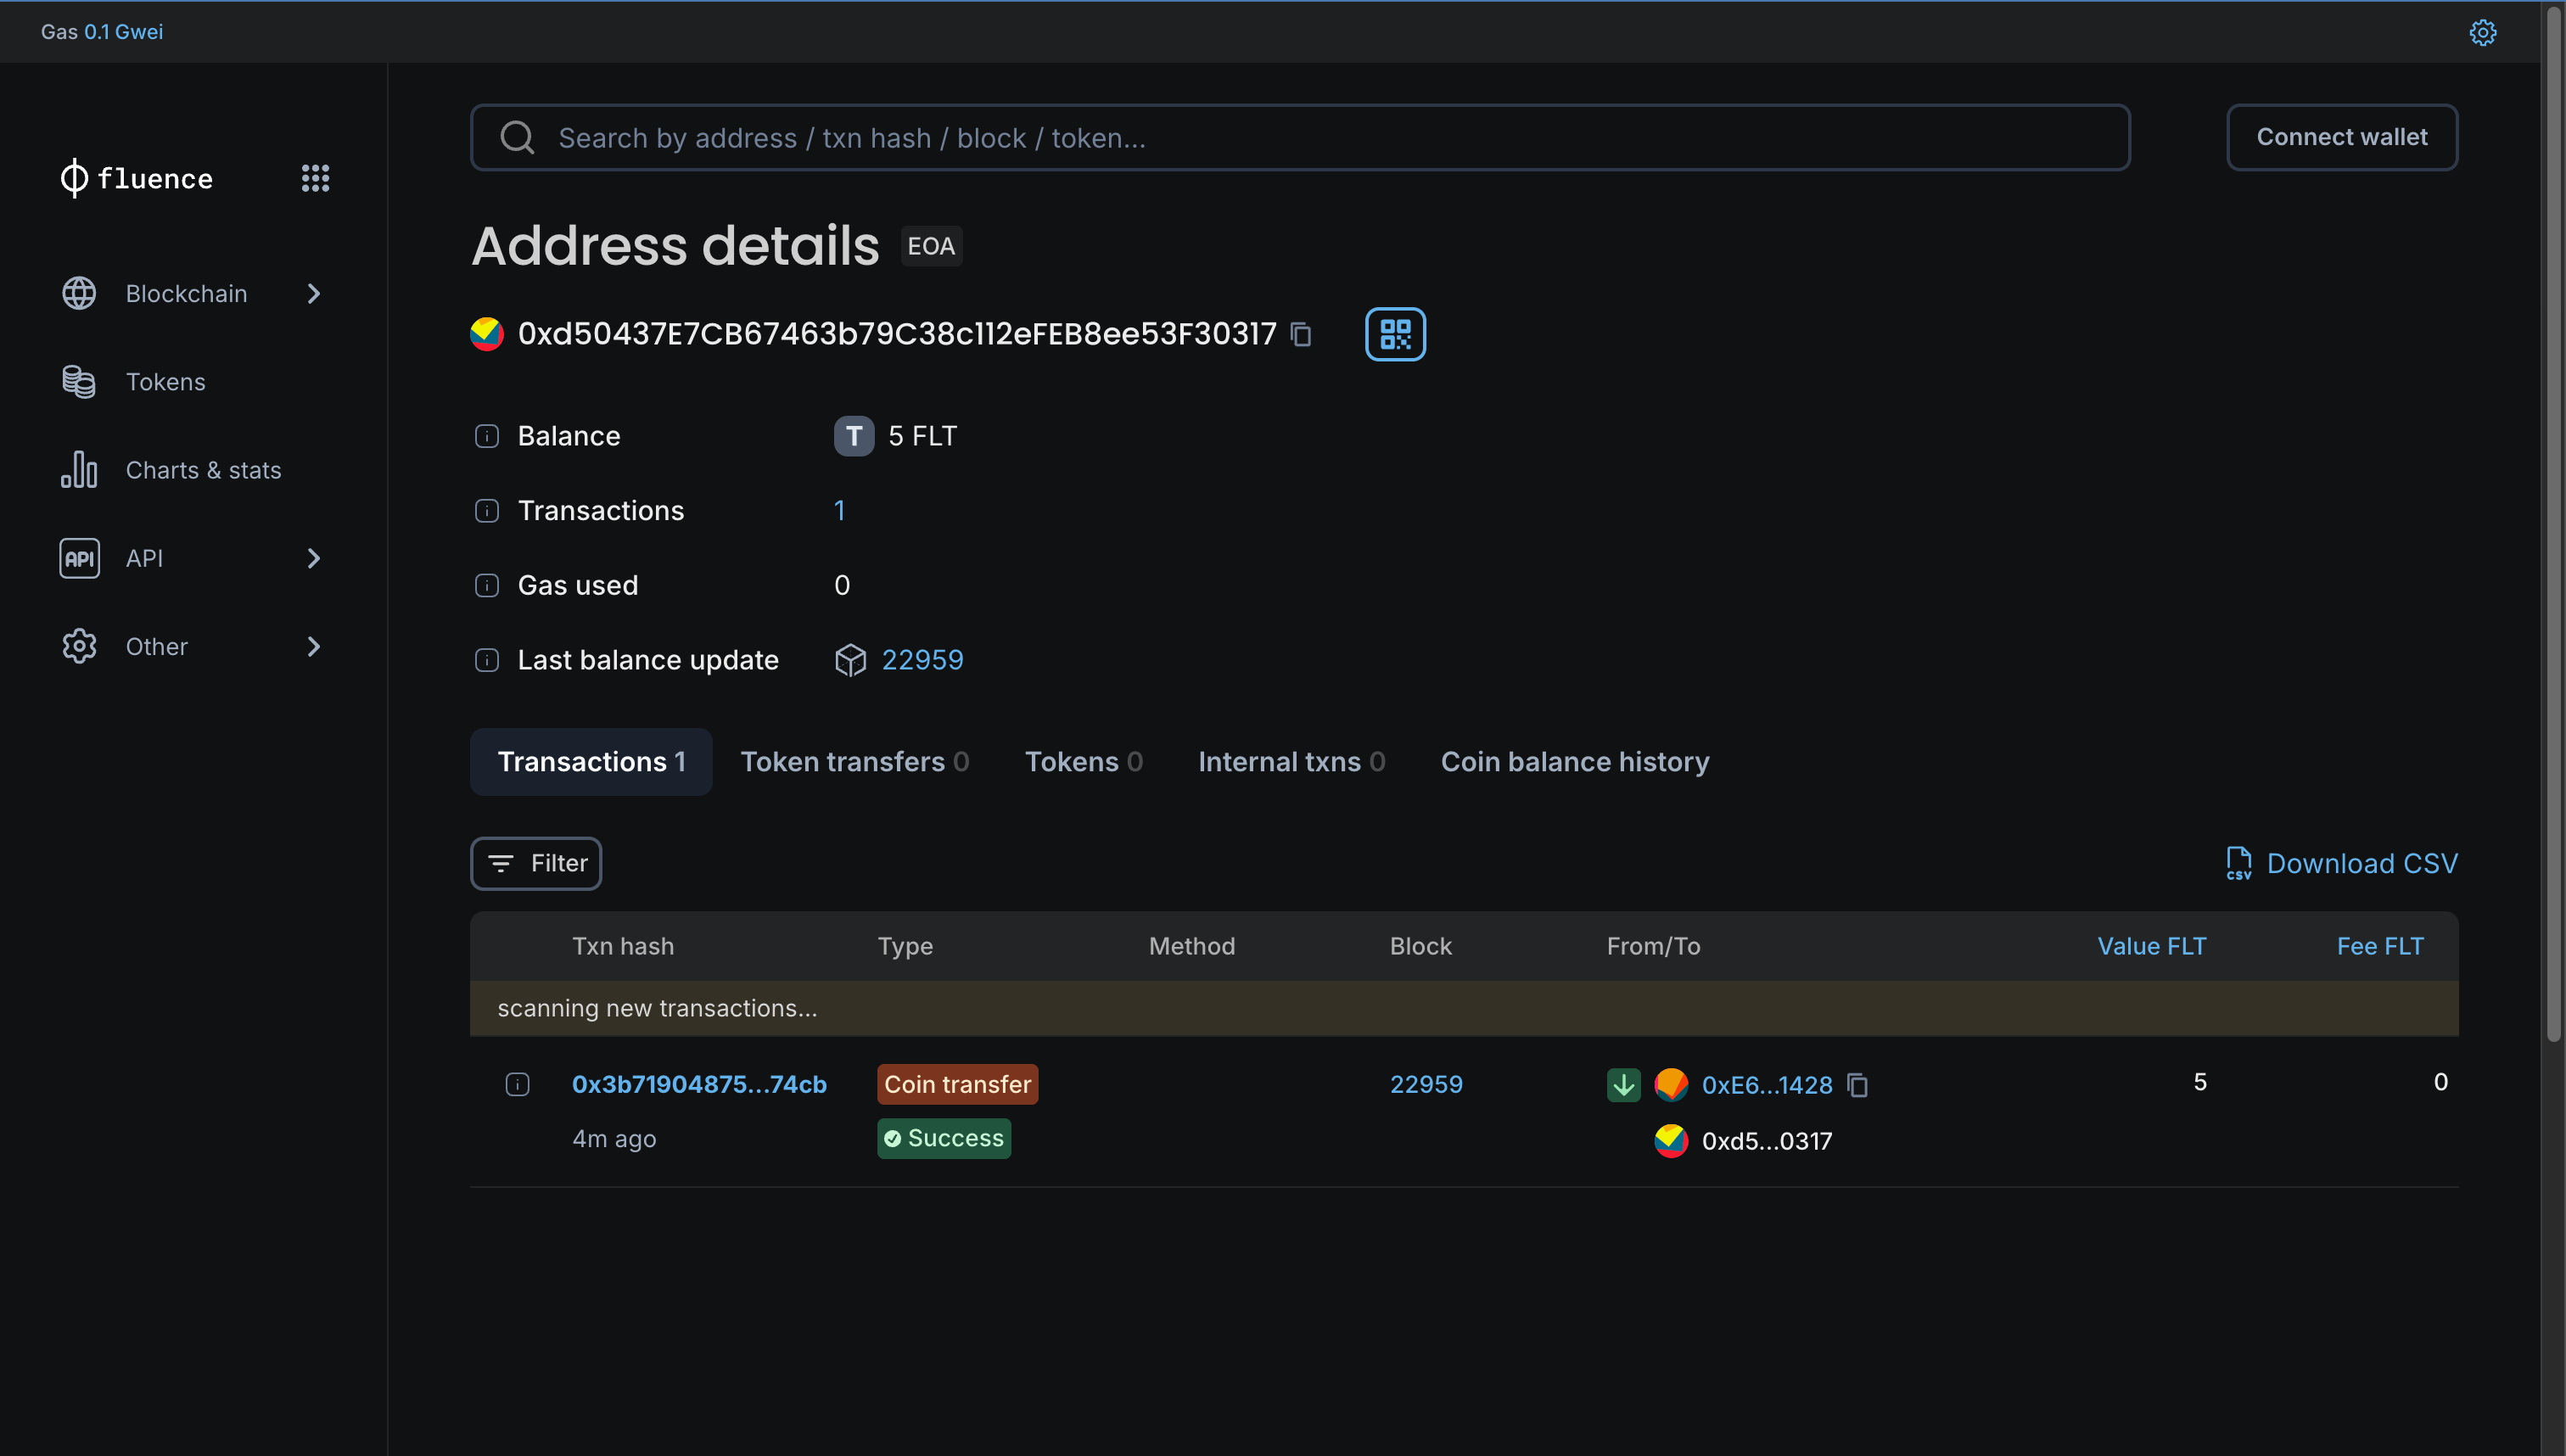
-
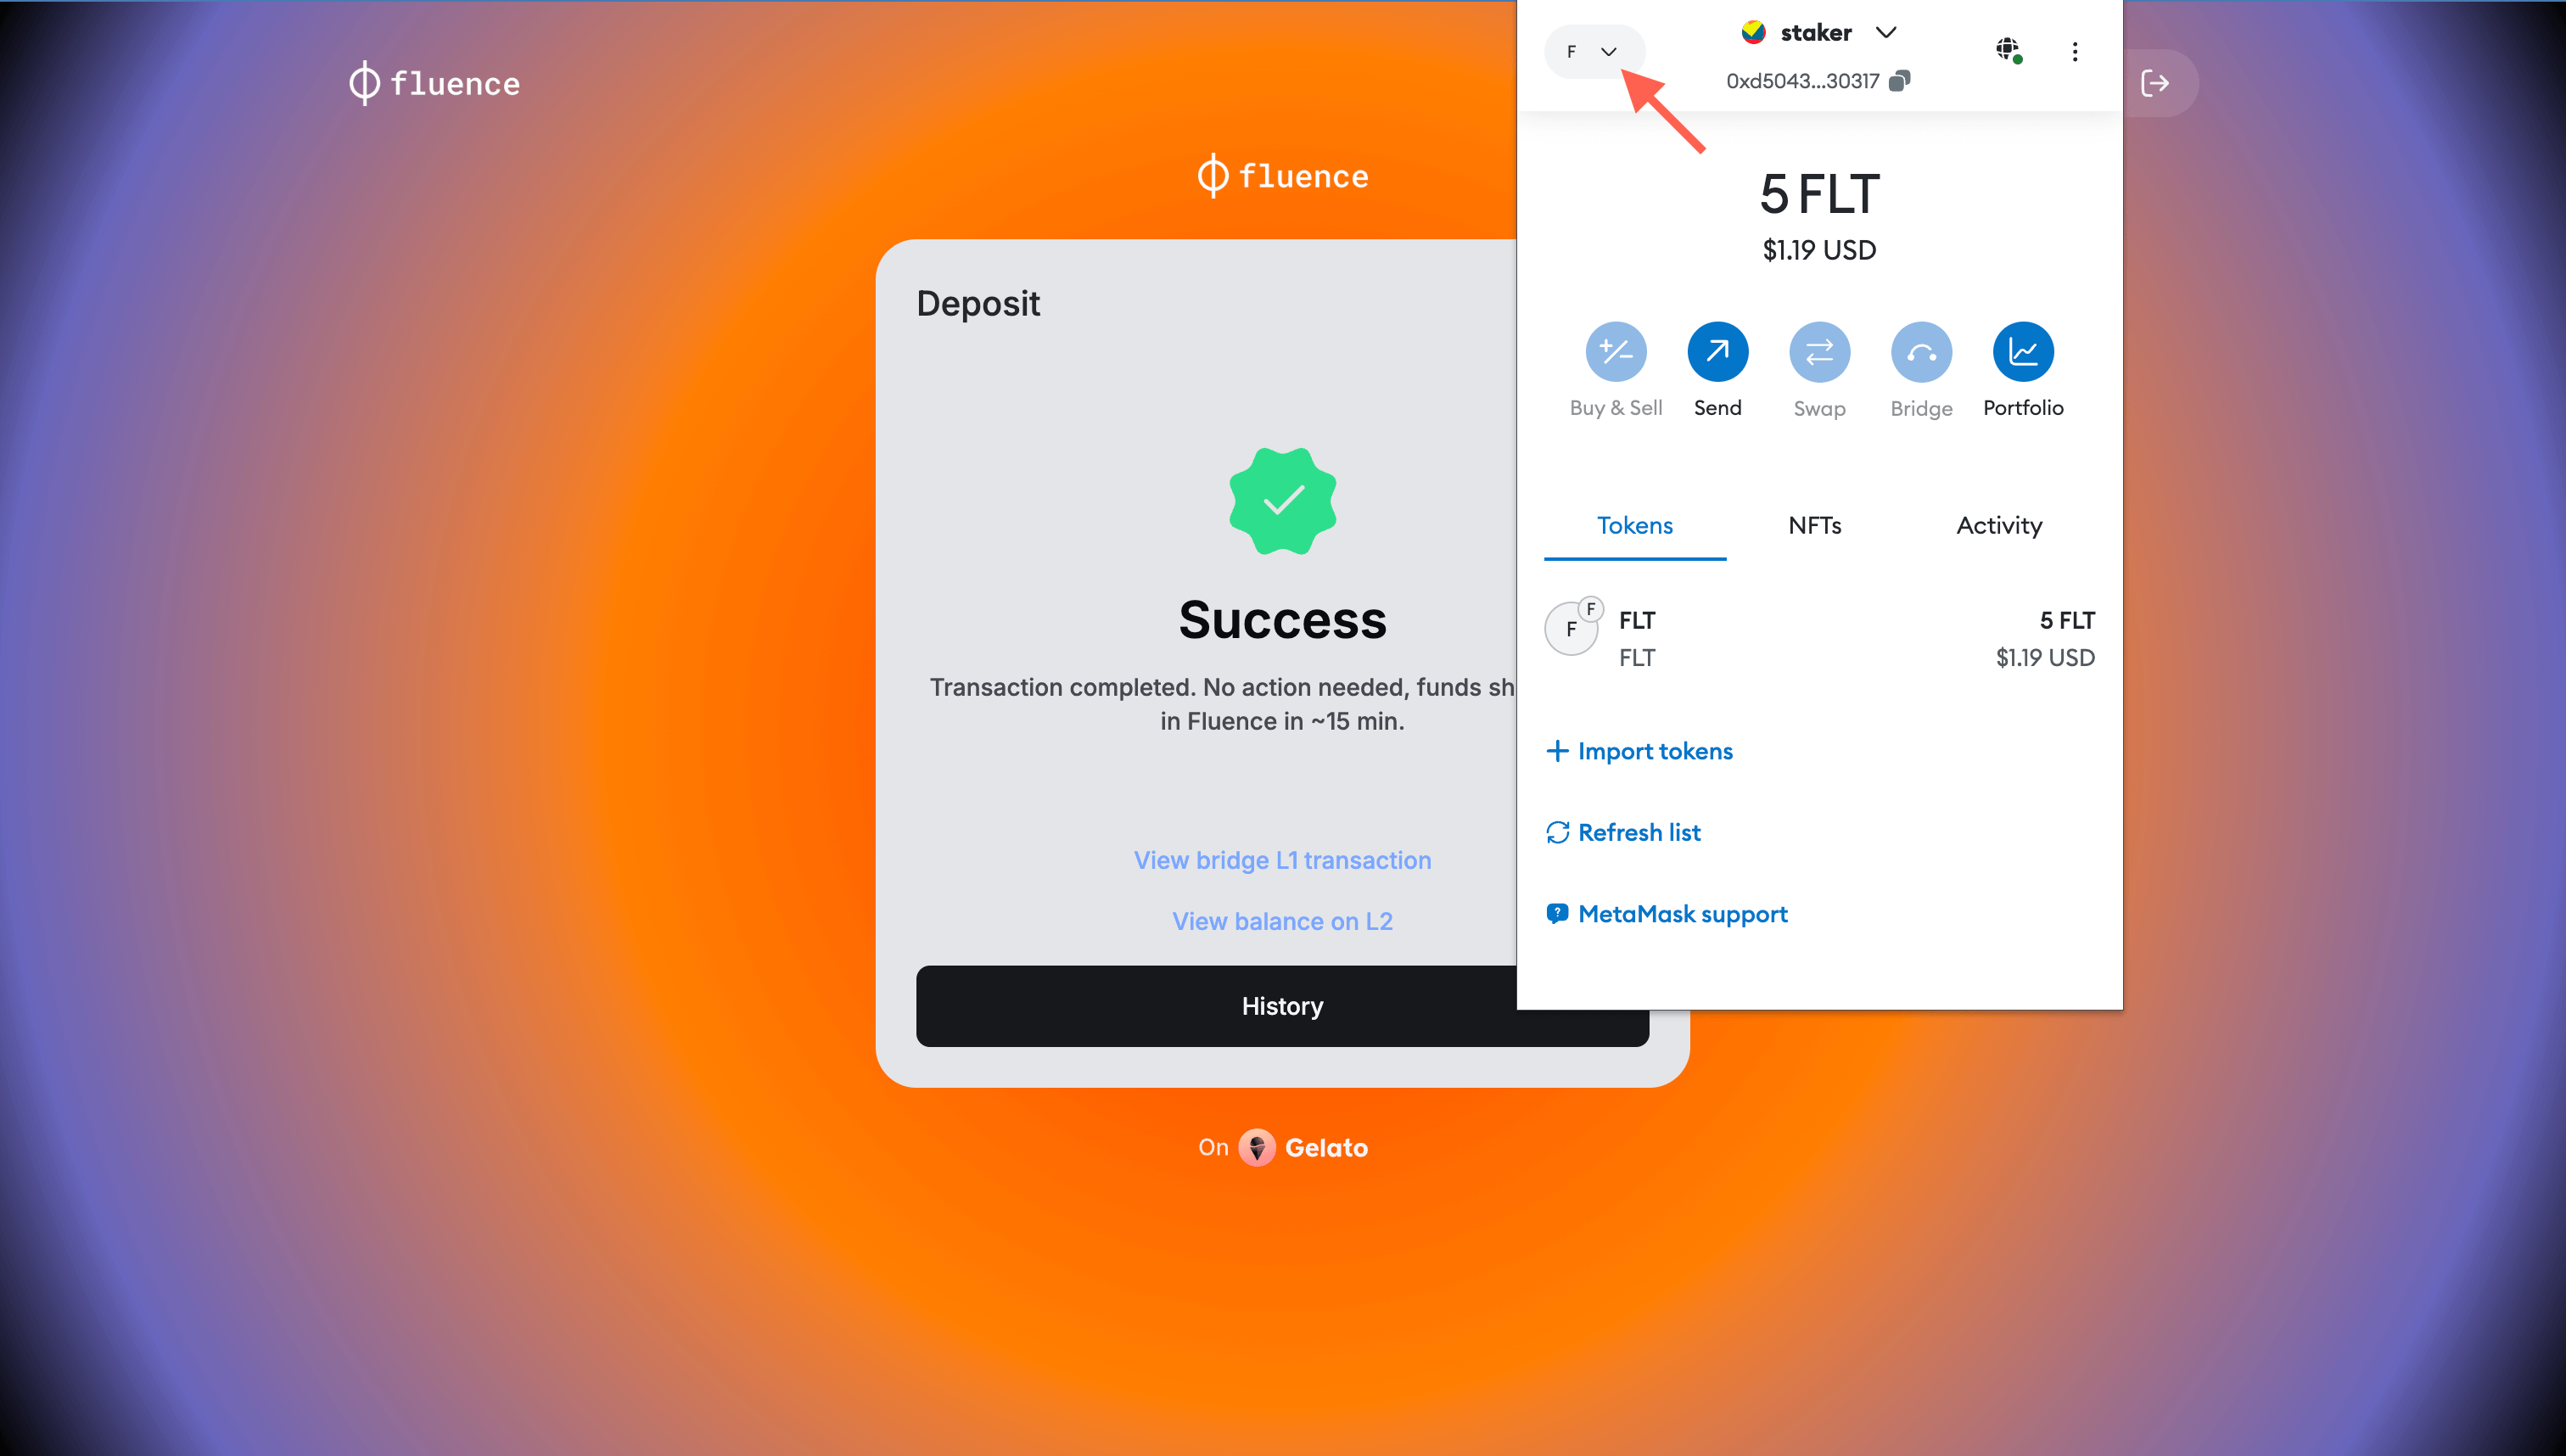
The transferred tokens will be reflected in your wallet as well. To see the transferred tokens, you need to switch the network of your wallet to the Fluence Network and ensure that the FLT token was previously added to your wallet, or it won't be displayed (read more in the "Prepare your wallet" section).
Congratulations! You successfully and safely bridged your FLT tokens from the Ethereum Mainnet to the Fluence Mainnet network. Now, you can freely use your funds and stake your FLTs!
If you encounter any issues while depositing or withdrawing tokens through the Bridge, please reach out for assistance. You can submit a support ticket through our official Discord channel, where our Fluence Customer Support team will help you resolve any problems.
Withdrawing Tokens (Fluence to Ethereum)
Token withdrawal from the Fluence Mainnet to the Ethereum Mainnet takes seven days.
The Fluence L2 network uses Optimistic Rollups, which rely on a security mechanism called "fraud proofs." When a user initiates a withdrawal from the Fluence network to Ethereum, the protocol enters a challenge period (7 days) to ensure that no fraudulent transactions have occurred.
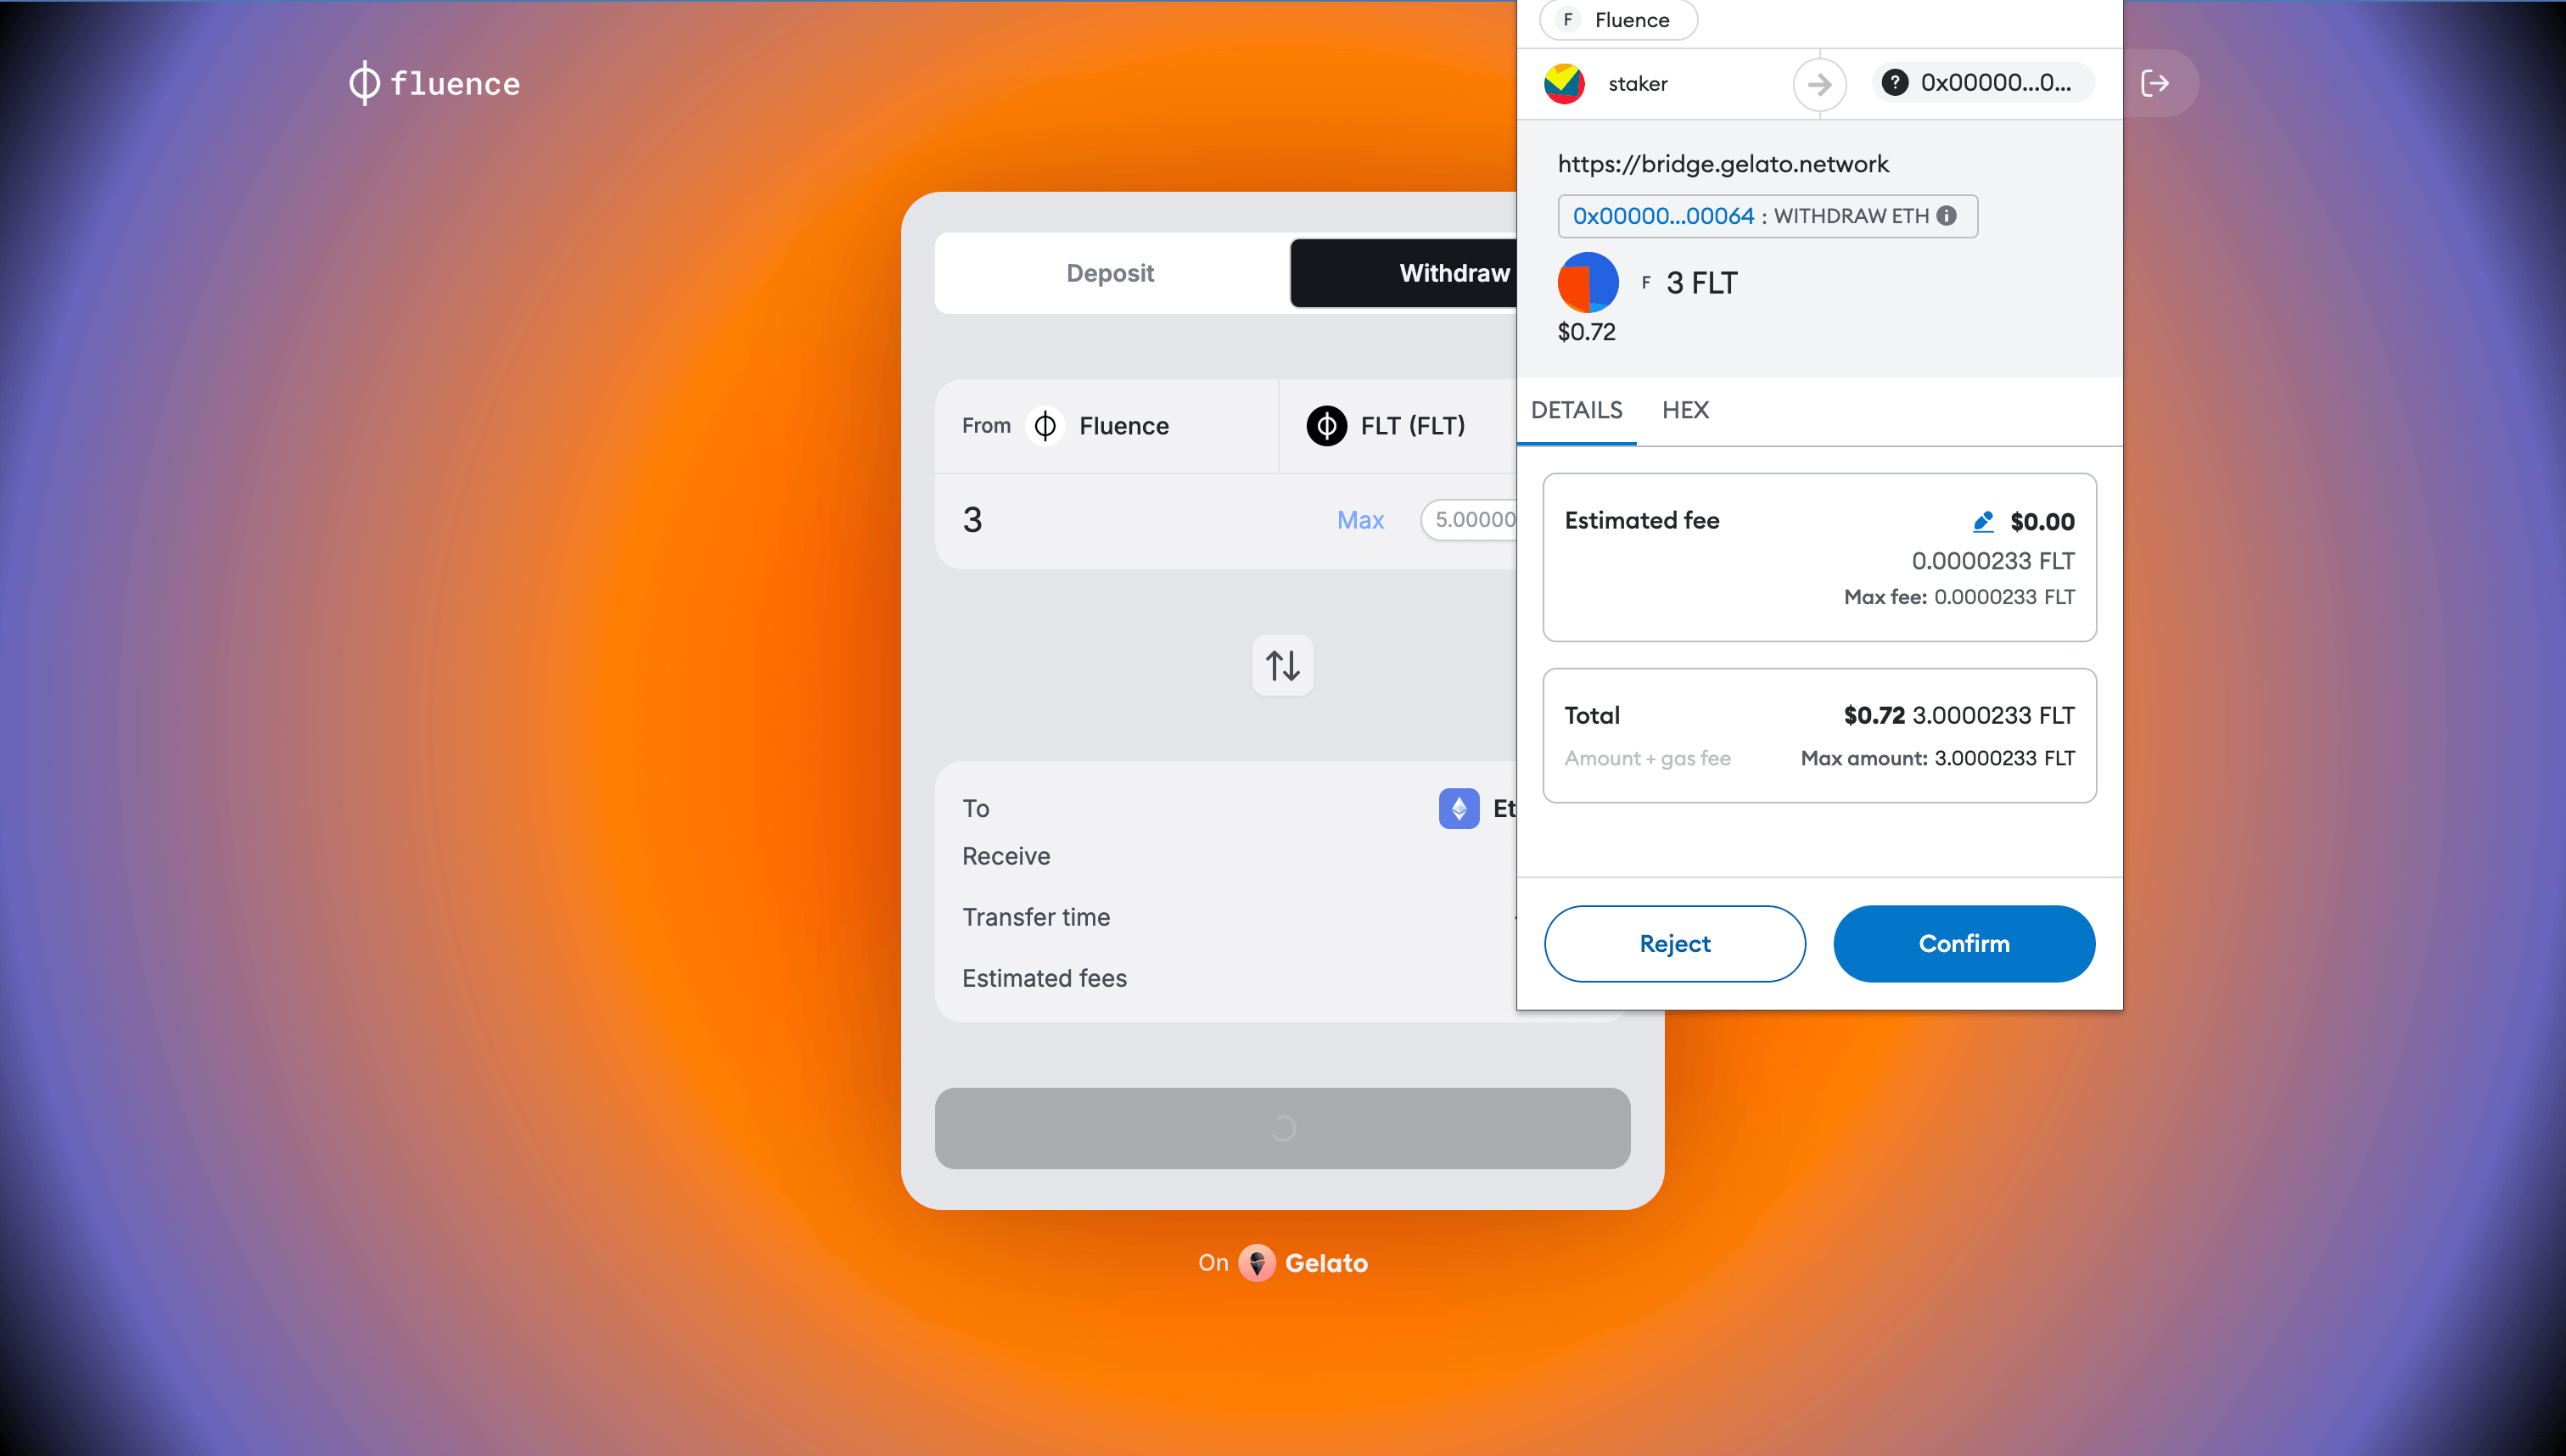
To bridge tokens from the Fluence Network to the Ethereum Network:
-
Choose the “withdraw” tab in the central panel of the bridge application
-
Choose the token you want to bridge. In this example, the FLT token is bridged
-
Enter the token amount you want to withdraw from Fluence to Ethereum using your connected account
-
Ensure that in the bridge panel, the correct amount is displayed
-
Press “Withdraw Funds” button
-
Your wallet application will ask you to sign a transaction of token withdrawal:
-
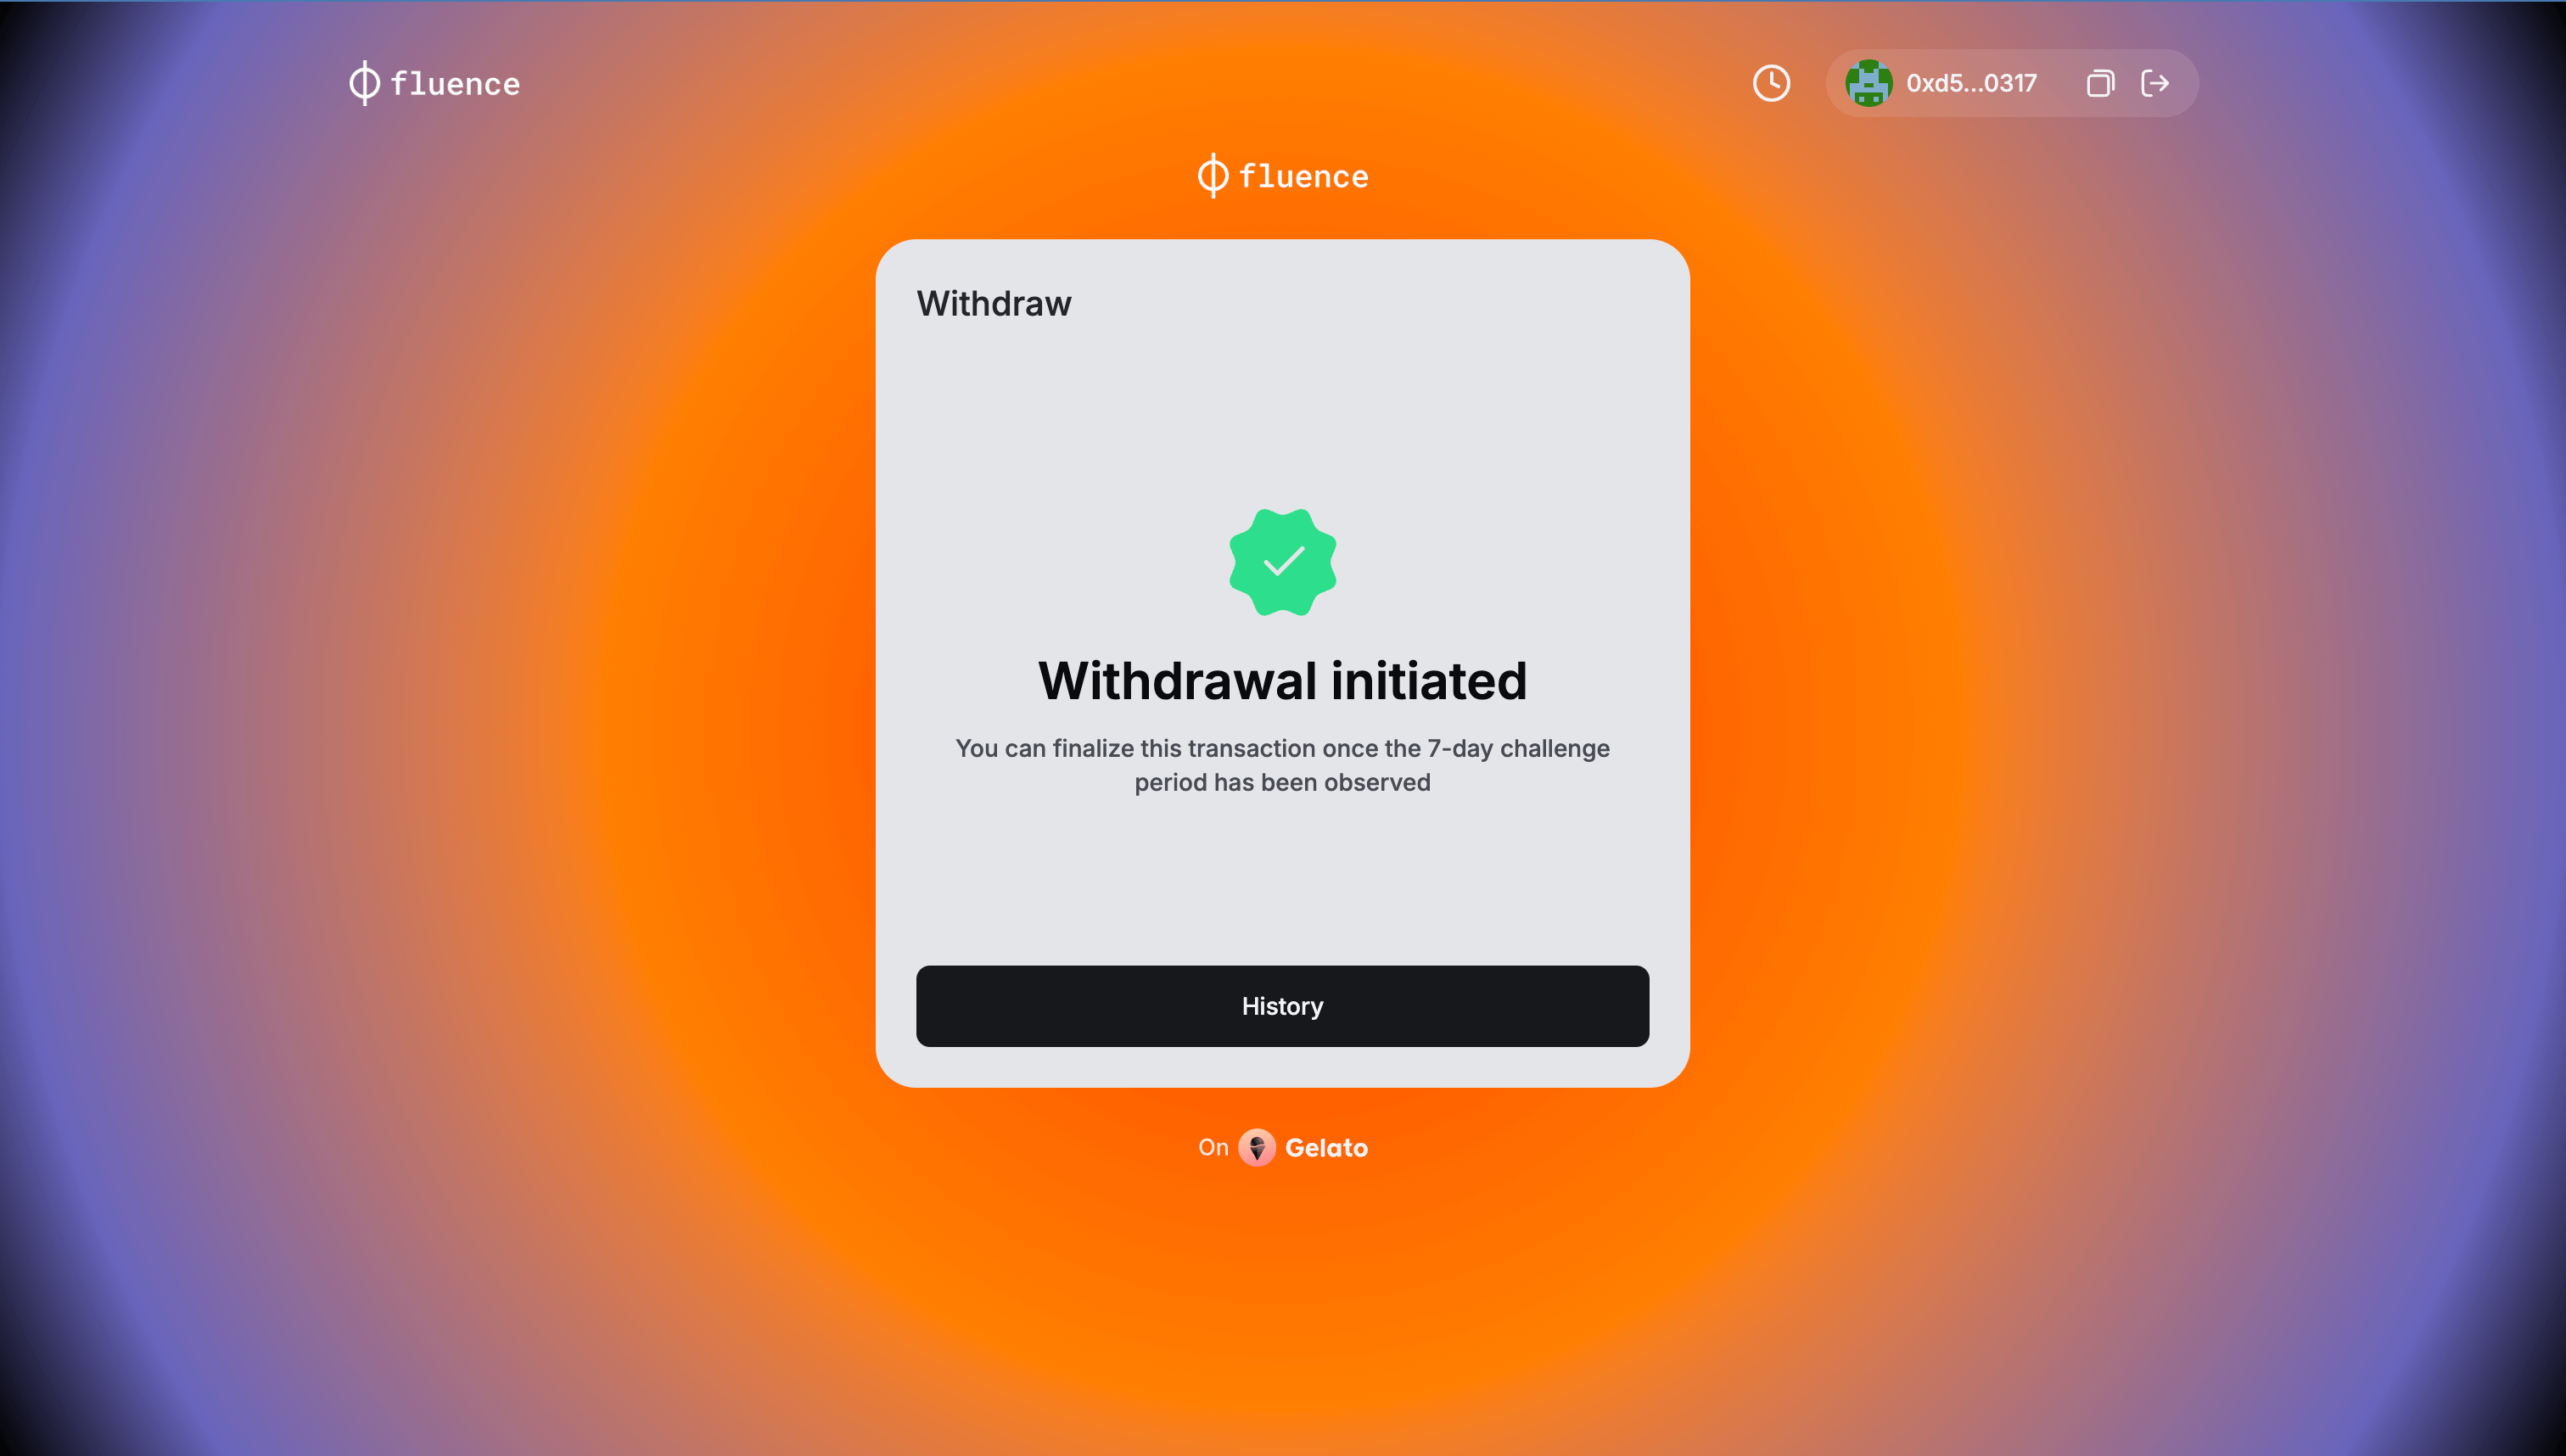
If the transaction to withdraw the tokens is successful, you will be redirected to the Bridge application and see the success message. Otherwise, you will see the transaction reversal error message.
-
You can track your withdrawal status on the Withdrawals history page. To open it, press “History” button in the information message. Read more about Withdrawals history in the next section.
-
You can also visit the Fluence blockscanner and ensure that the withdrawal initialization transaction has appeared. For that, open the link with your wallet address put in the placeholder: https://blockscout.mainnet.fluence.dev/address/
<YOUR_WALLET_ADDRESS>.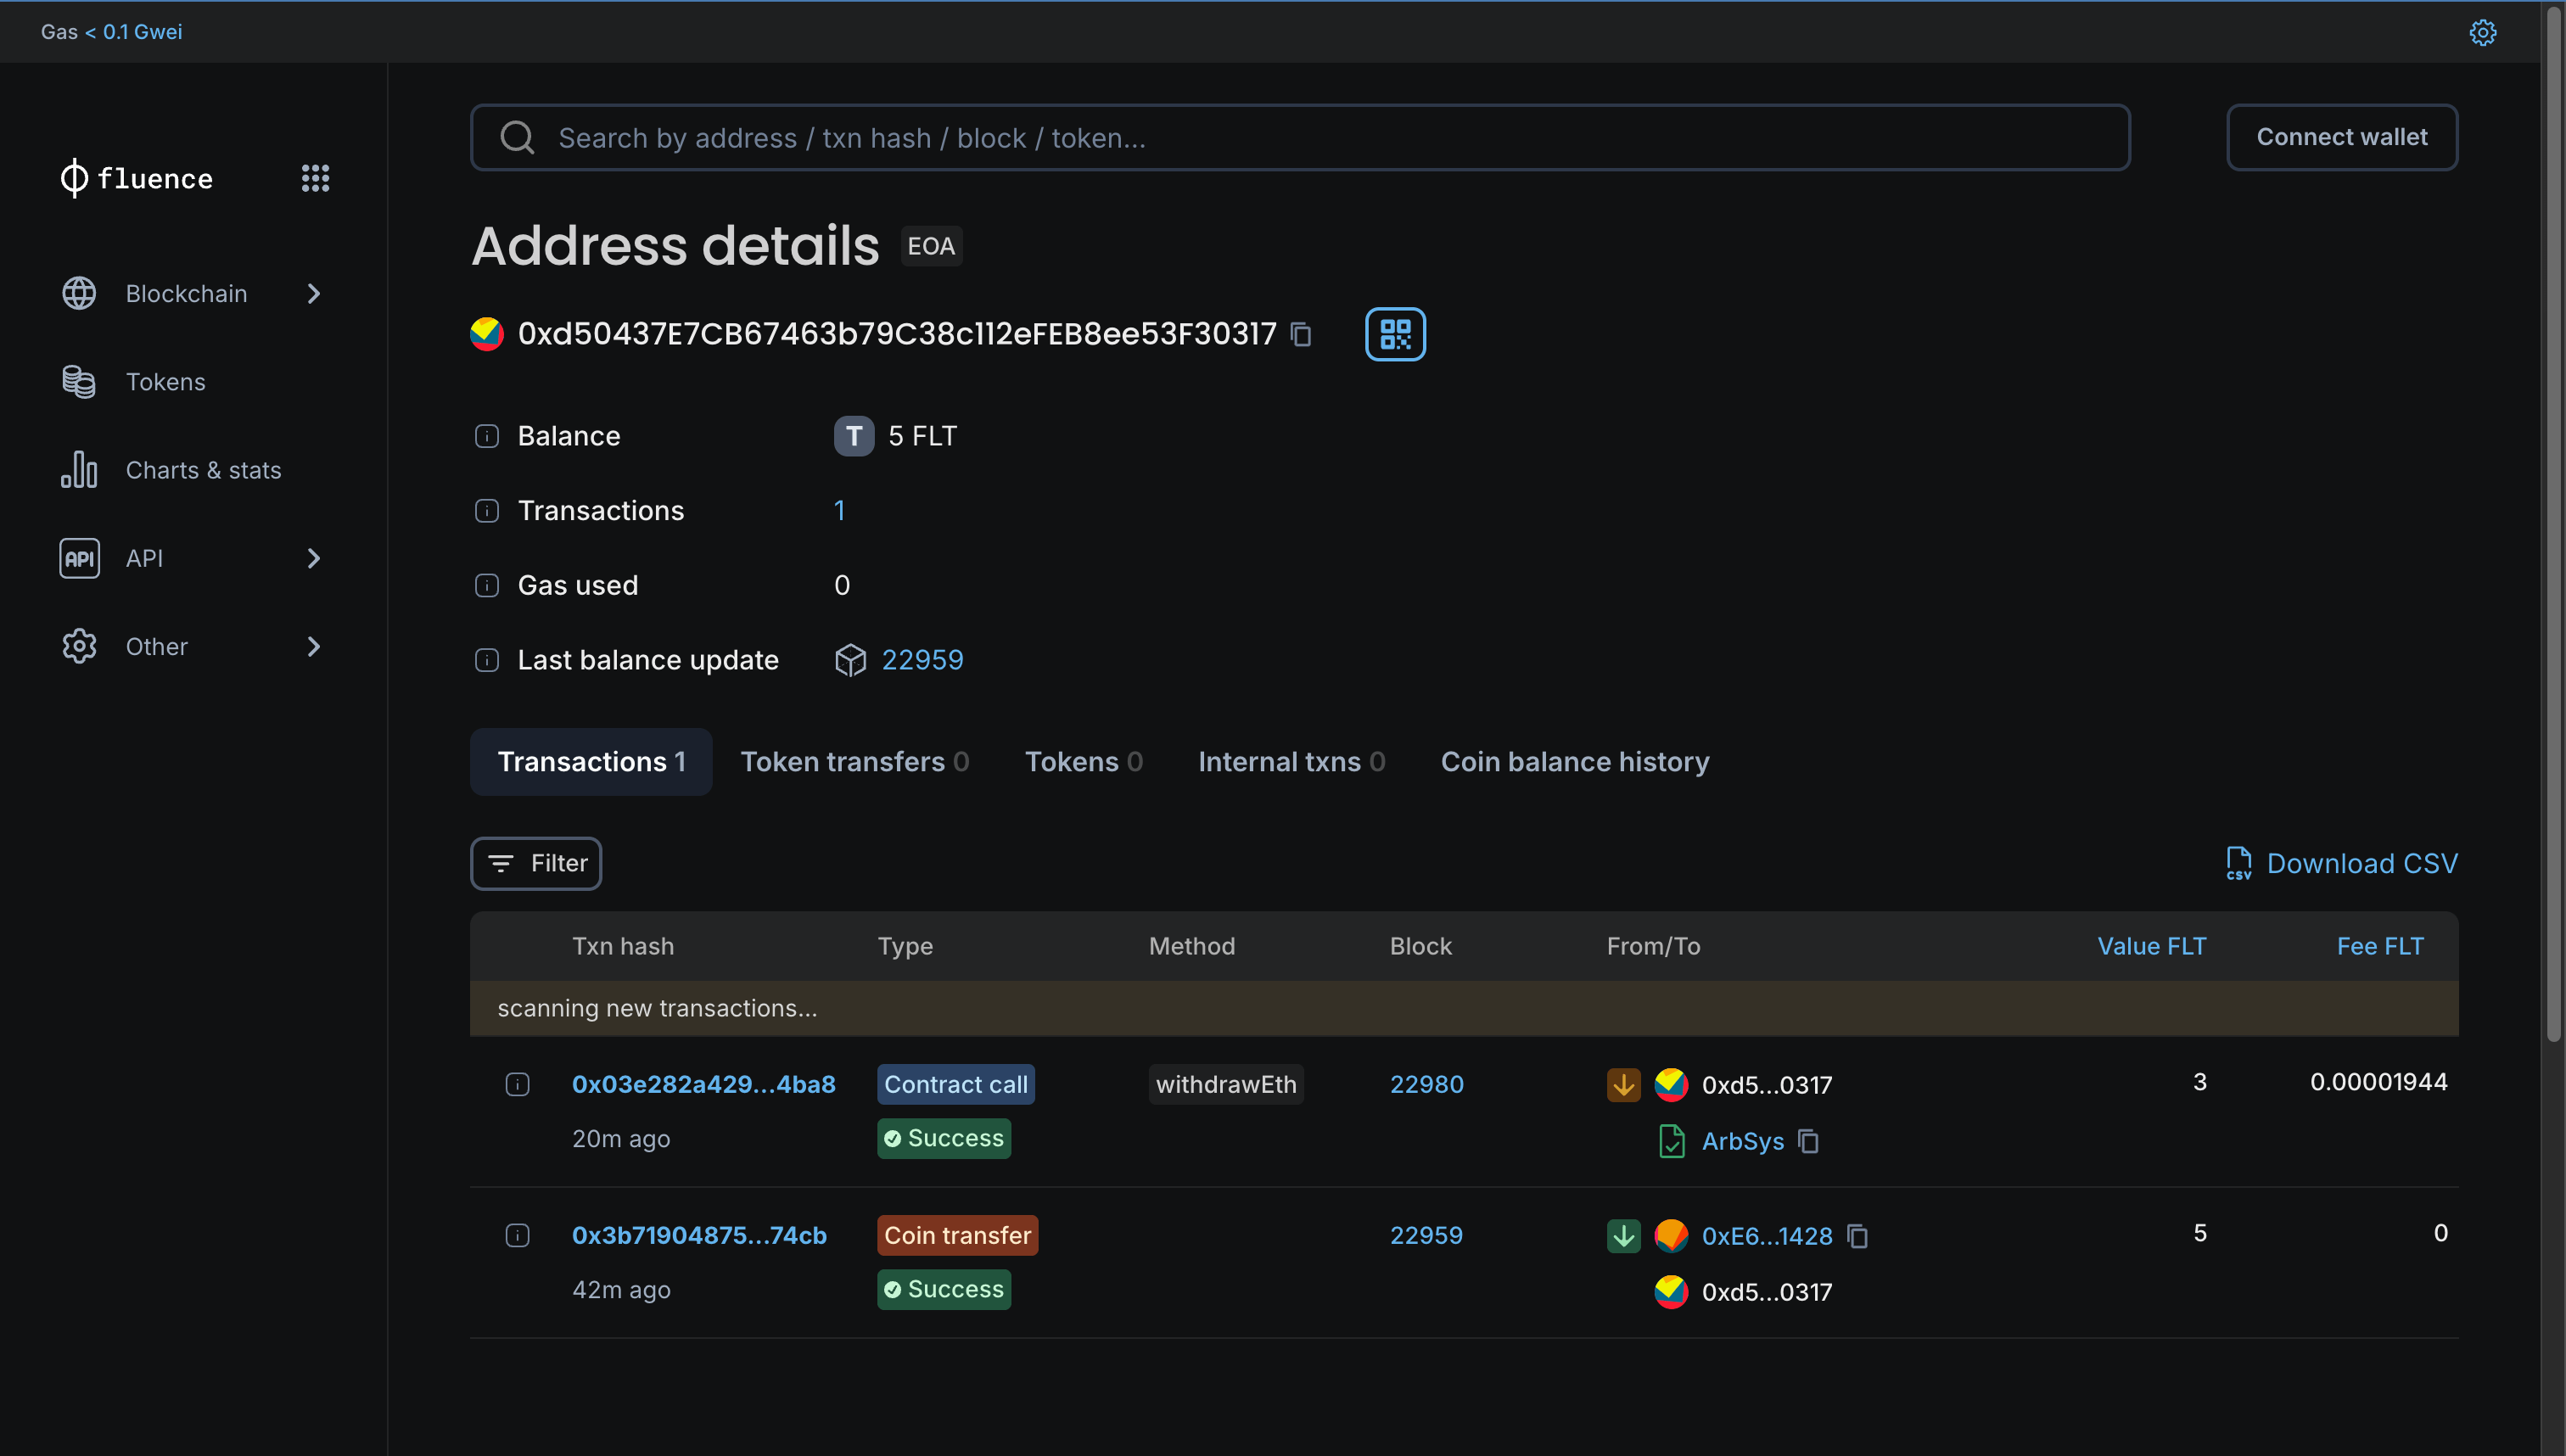
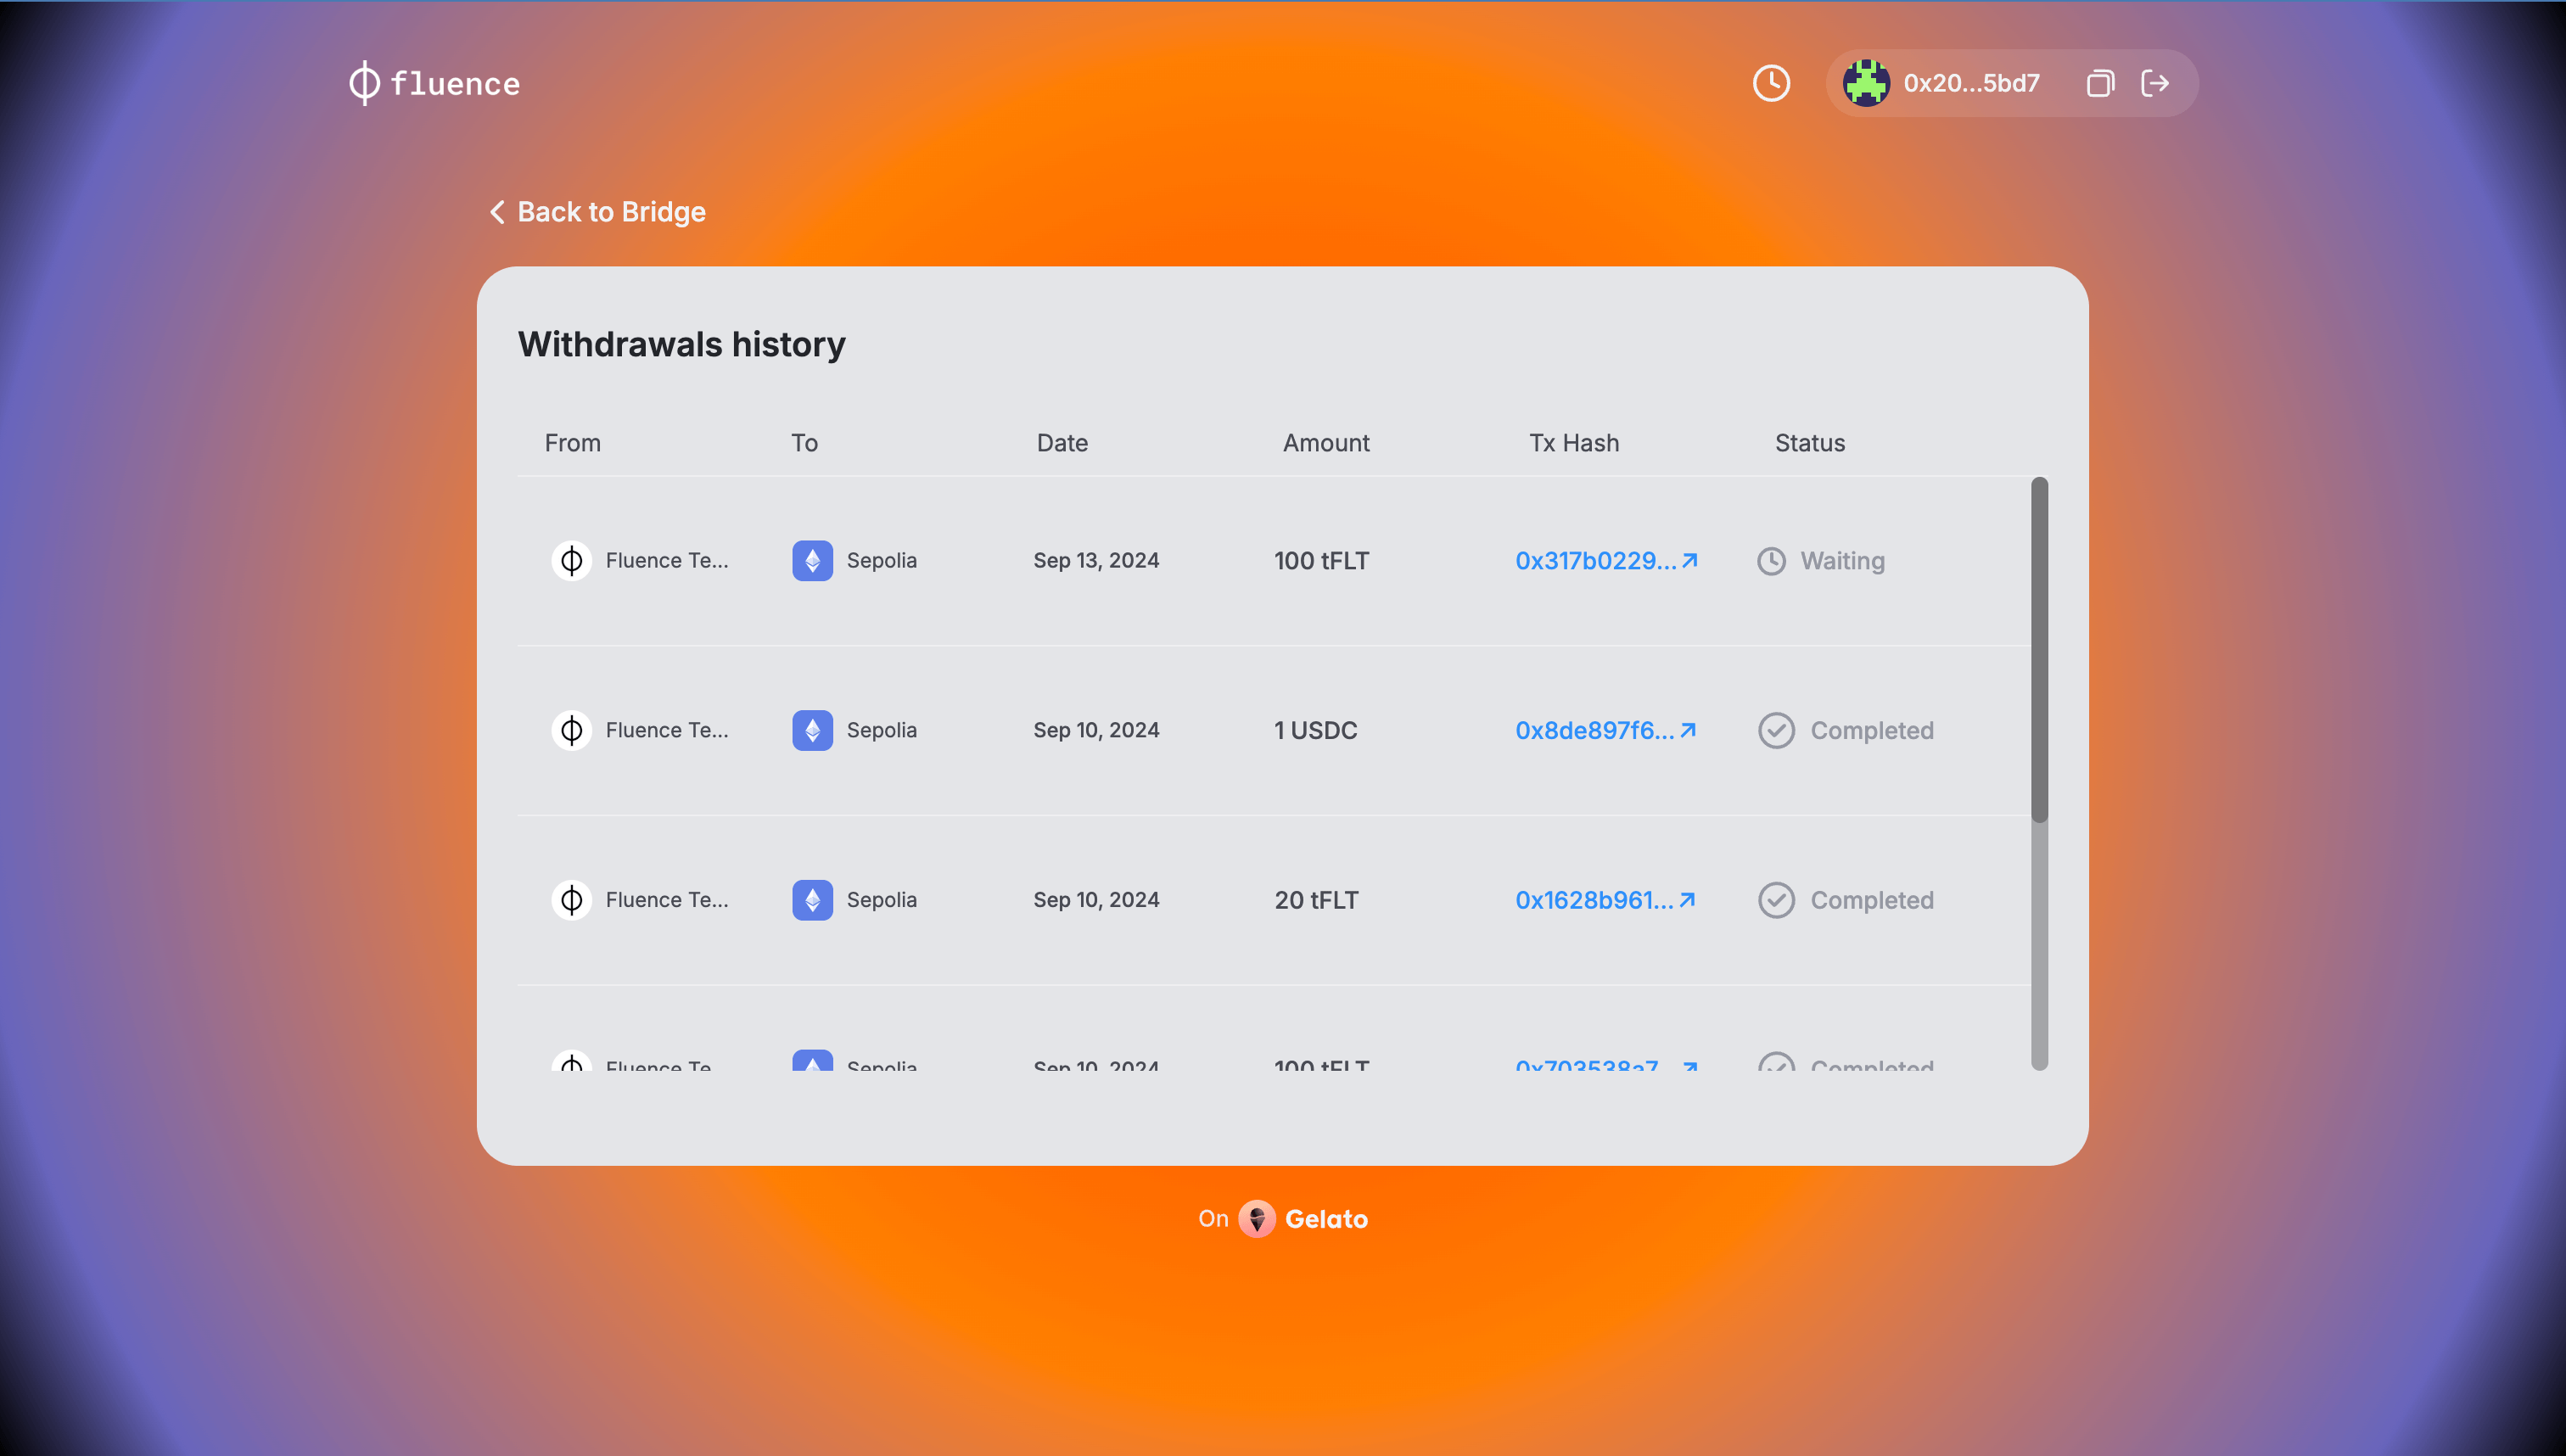
Withdrawals history page
The Withdrawals History page offers users an overview of your withdrawal transactions and respective statuses. To access this page, please connect the wallet you used to sign the transactions.
To access the Withdrawals history page, users have two options:
- After initiating a funds withdrawal, the "History" button appears in the confirmation message. Clicking this button provides immediate access to recent activity.
- Alternatively, you can click the history button located in the top-right corner, next to the account information.
It's important to note that the Withdrawals history is only visible when your wallet is connected to the Ethereum Mainnet. Otherwise, the "Switch network" button will appear, which, when clicked, will initiate the network change process in the user's wallet application.
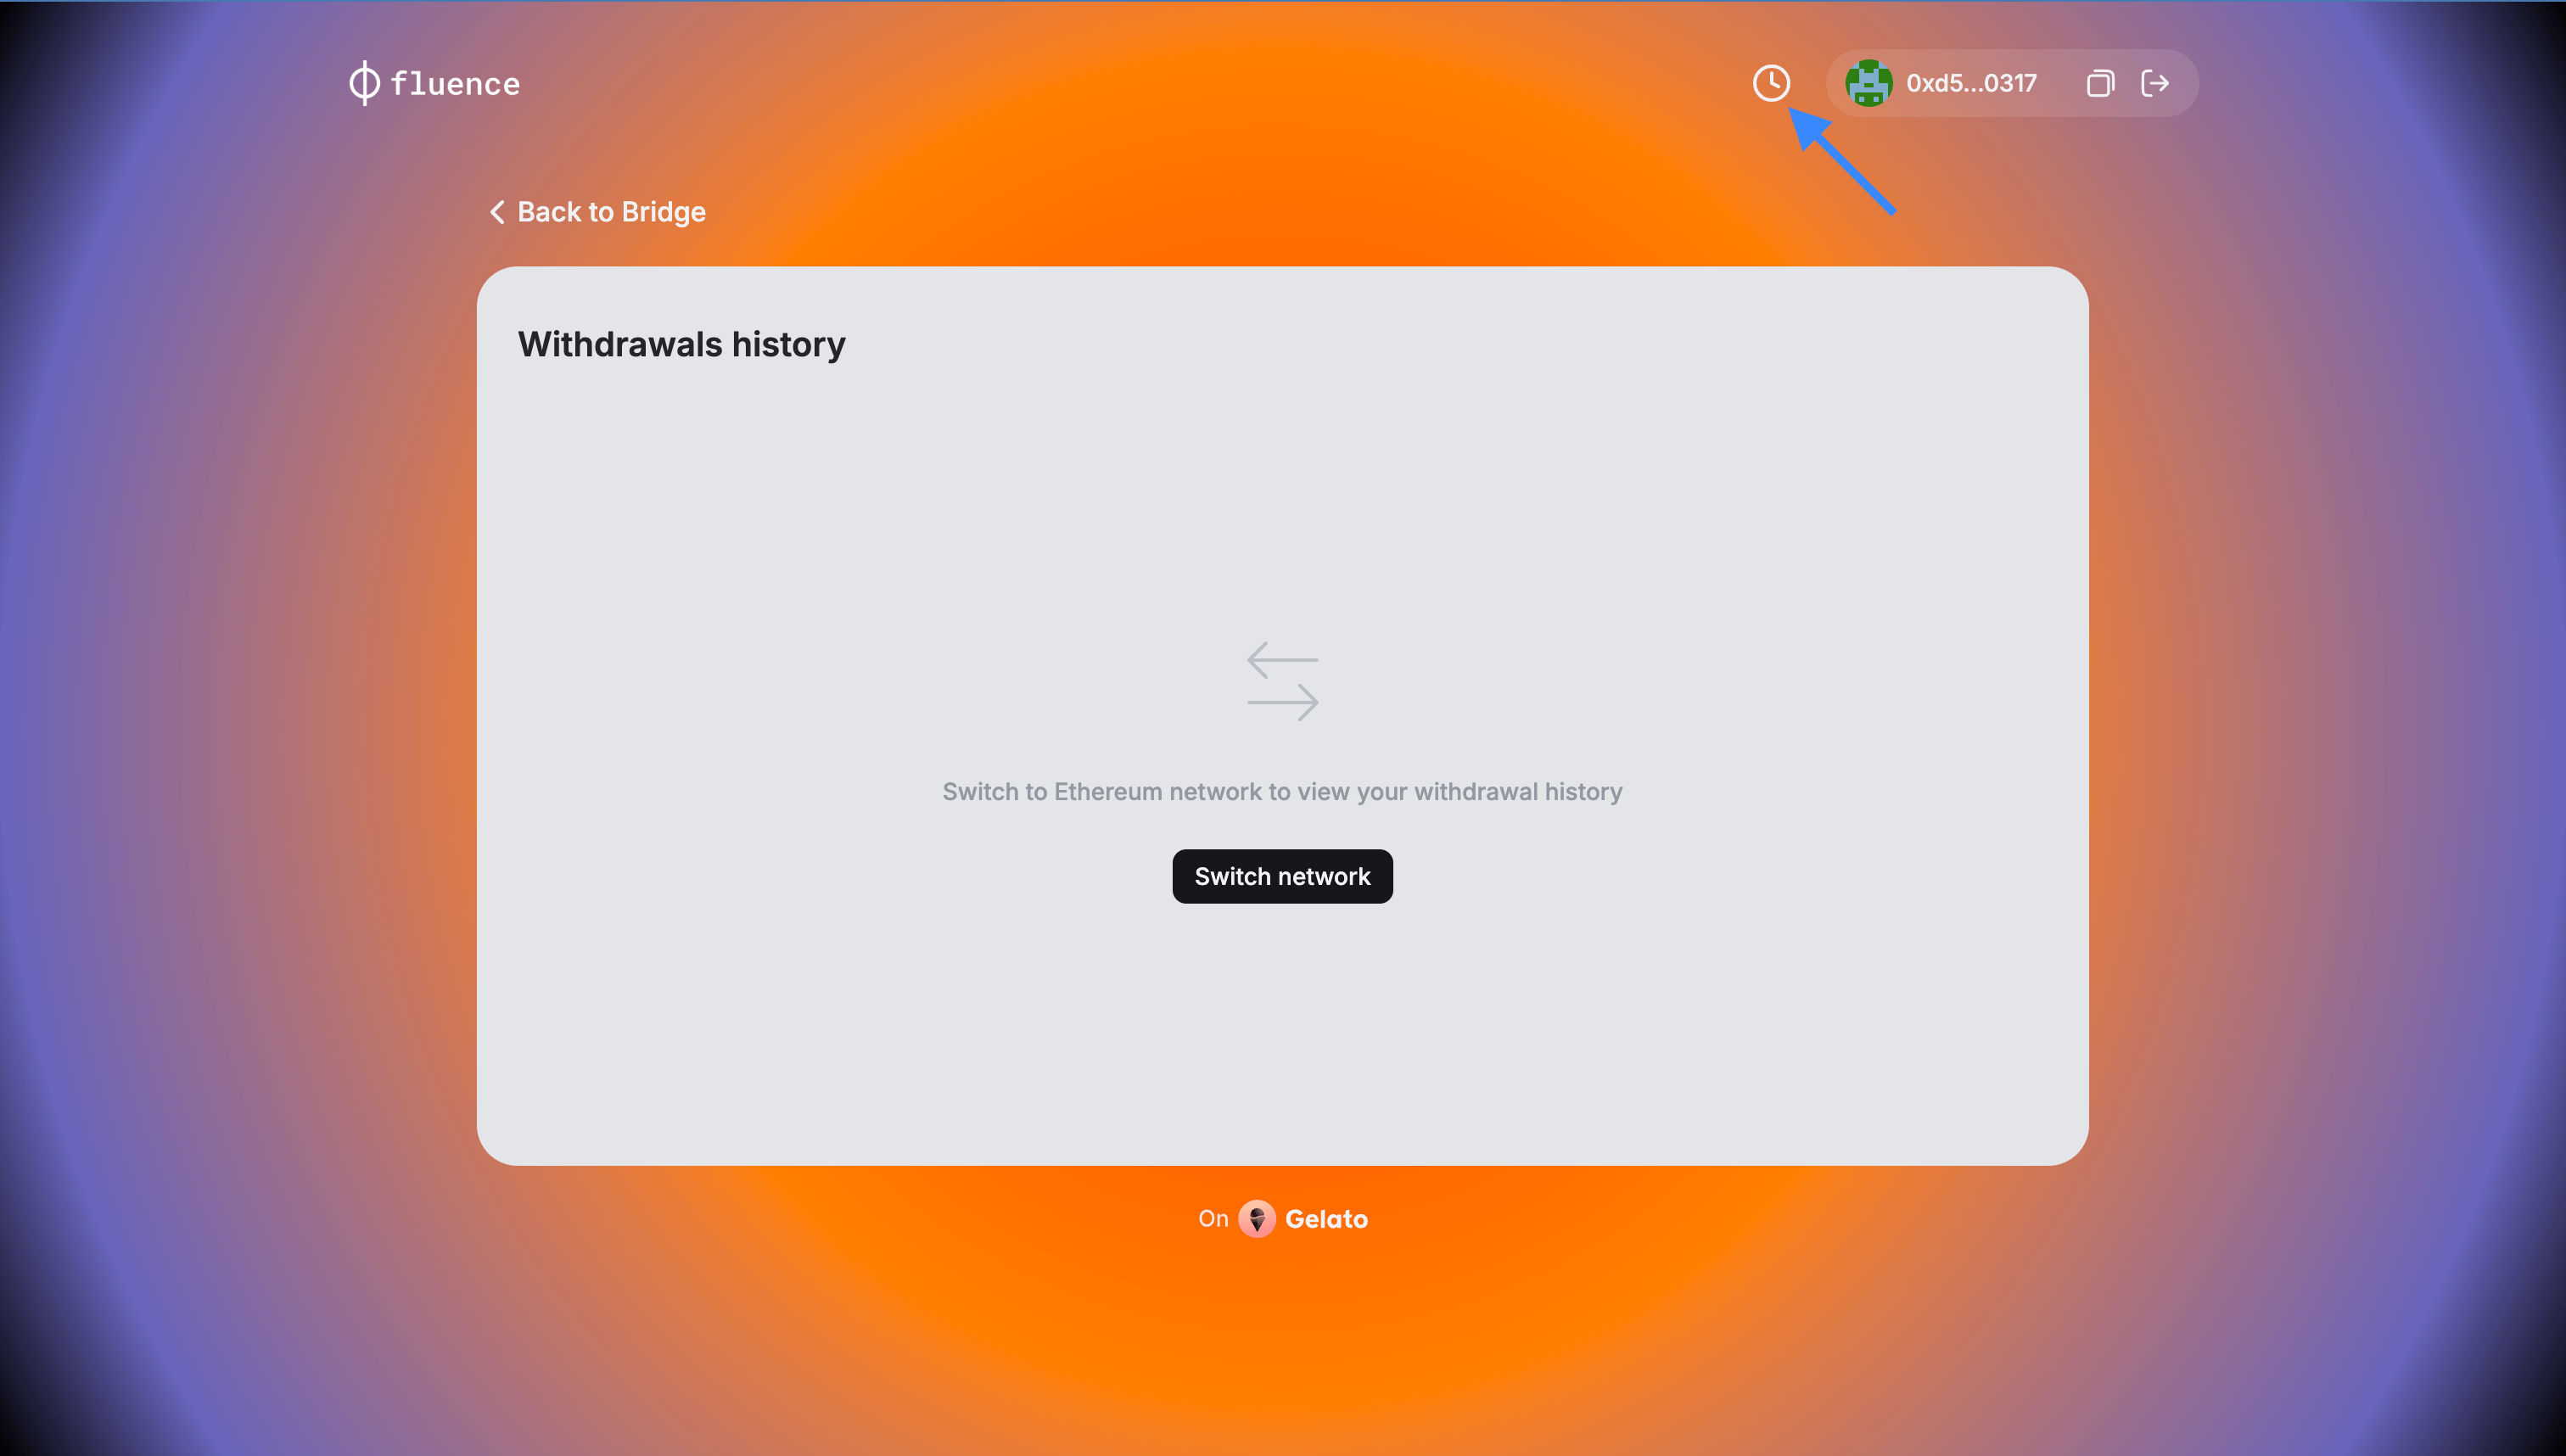 The view of the Withdrawals history page for wallets not connected to Ethereum
The "History" page serves as a wallet-specific ledger, offering updates on the progress of withdrawal transactions. You can see all of your pending and completed transactions with transaction date, amount, status and hash.
A withdrawal transaction may have one of the following statuses:
Waiting: The seven day challenge period hasn’t passed yet.Claim: The funds are ready to be claimed. User can press the “Claim” button to withdraw the funds. Read more about the withdrawal process in the section below.Completed: The funds has been withdrawn successfully.
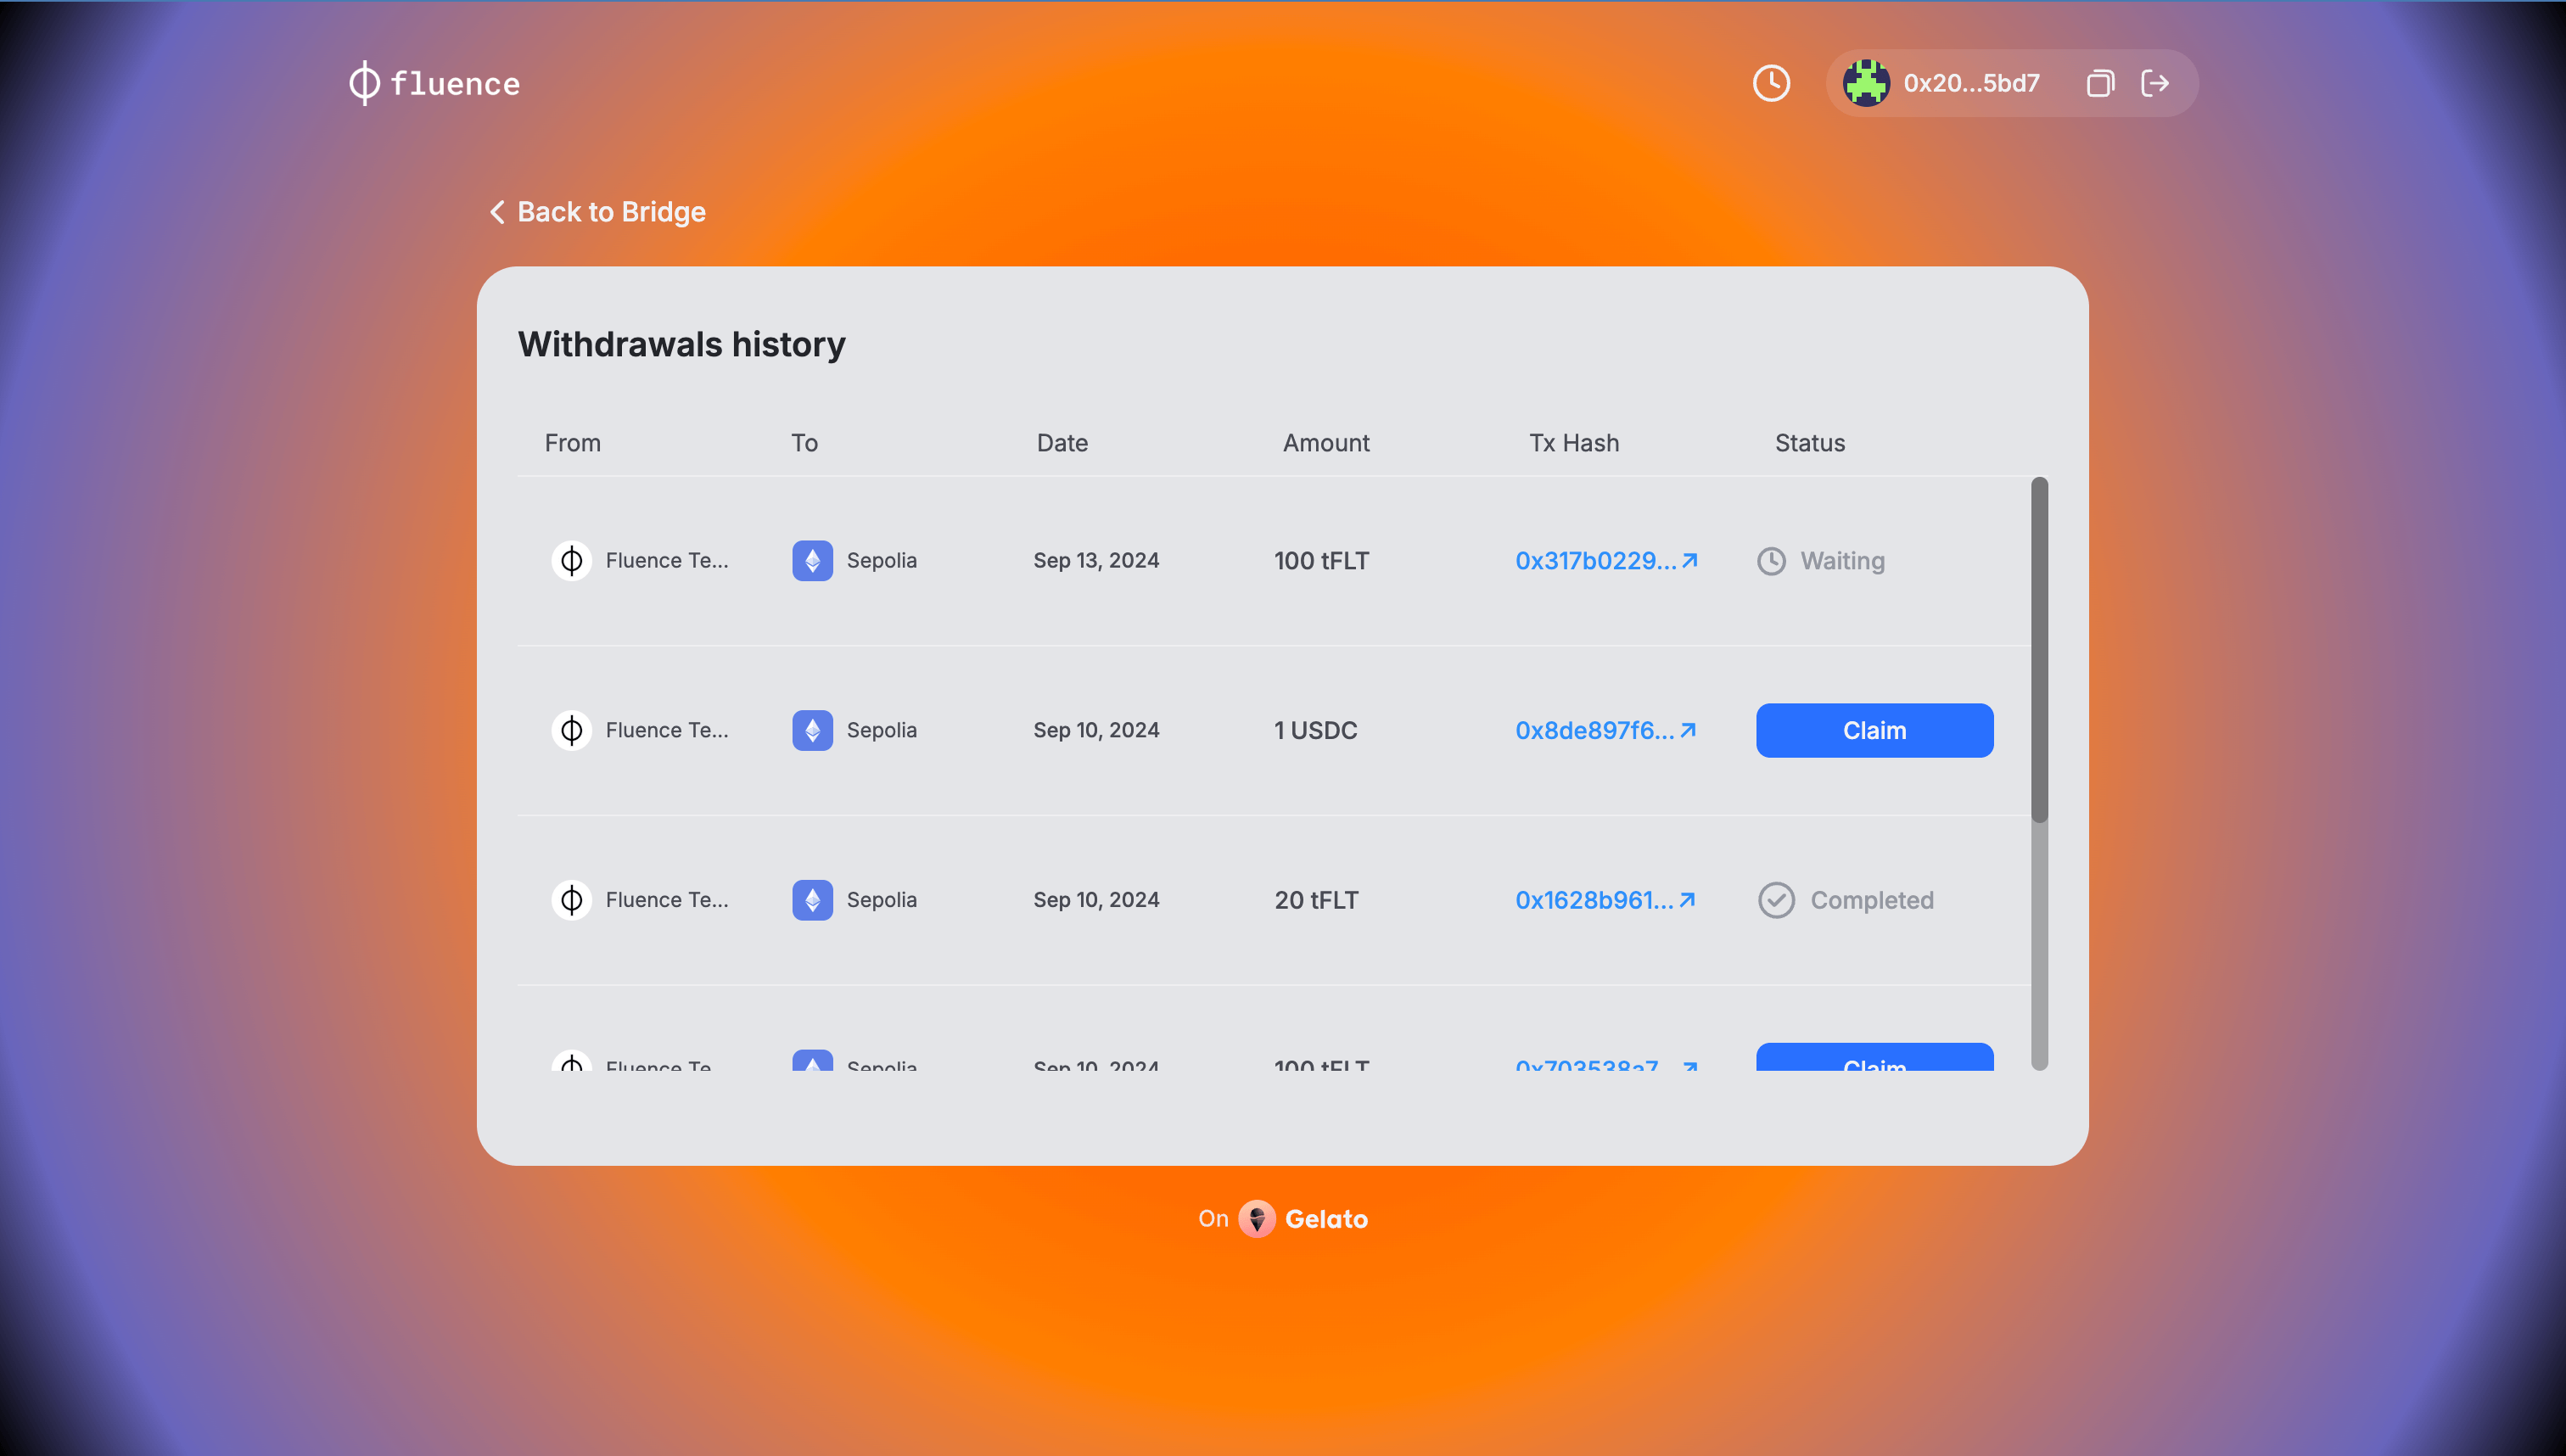 The view of the Withdrawals history page
Funds withdrawal after the challenge period has passed
Once the challenge period for your withdrawal transaction has expired (7 days), you will be able to safely withdraw your funds. You will see the "Claim" button in the "Status" field of the relevant withdrawal request. To withdraw the funds, follow these steps:
-
Press the "Claim" button to initialize the withdrawal of the funds to your wallet
-
Confirm the transaction in your wallet
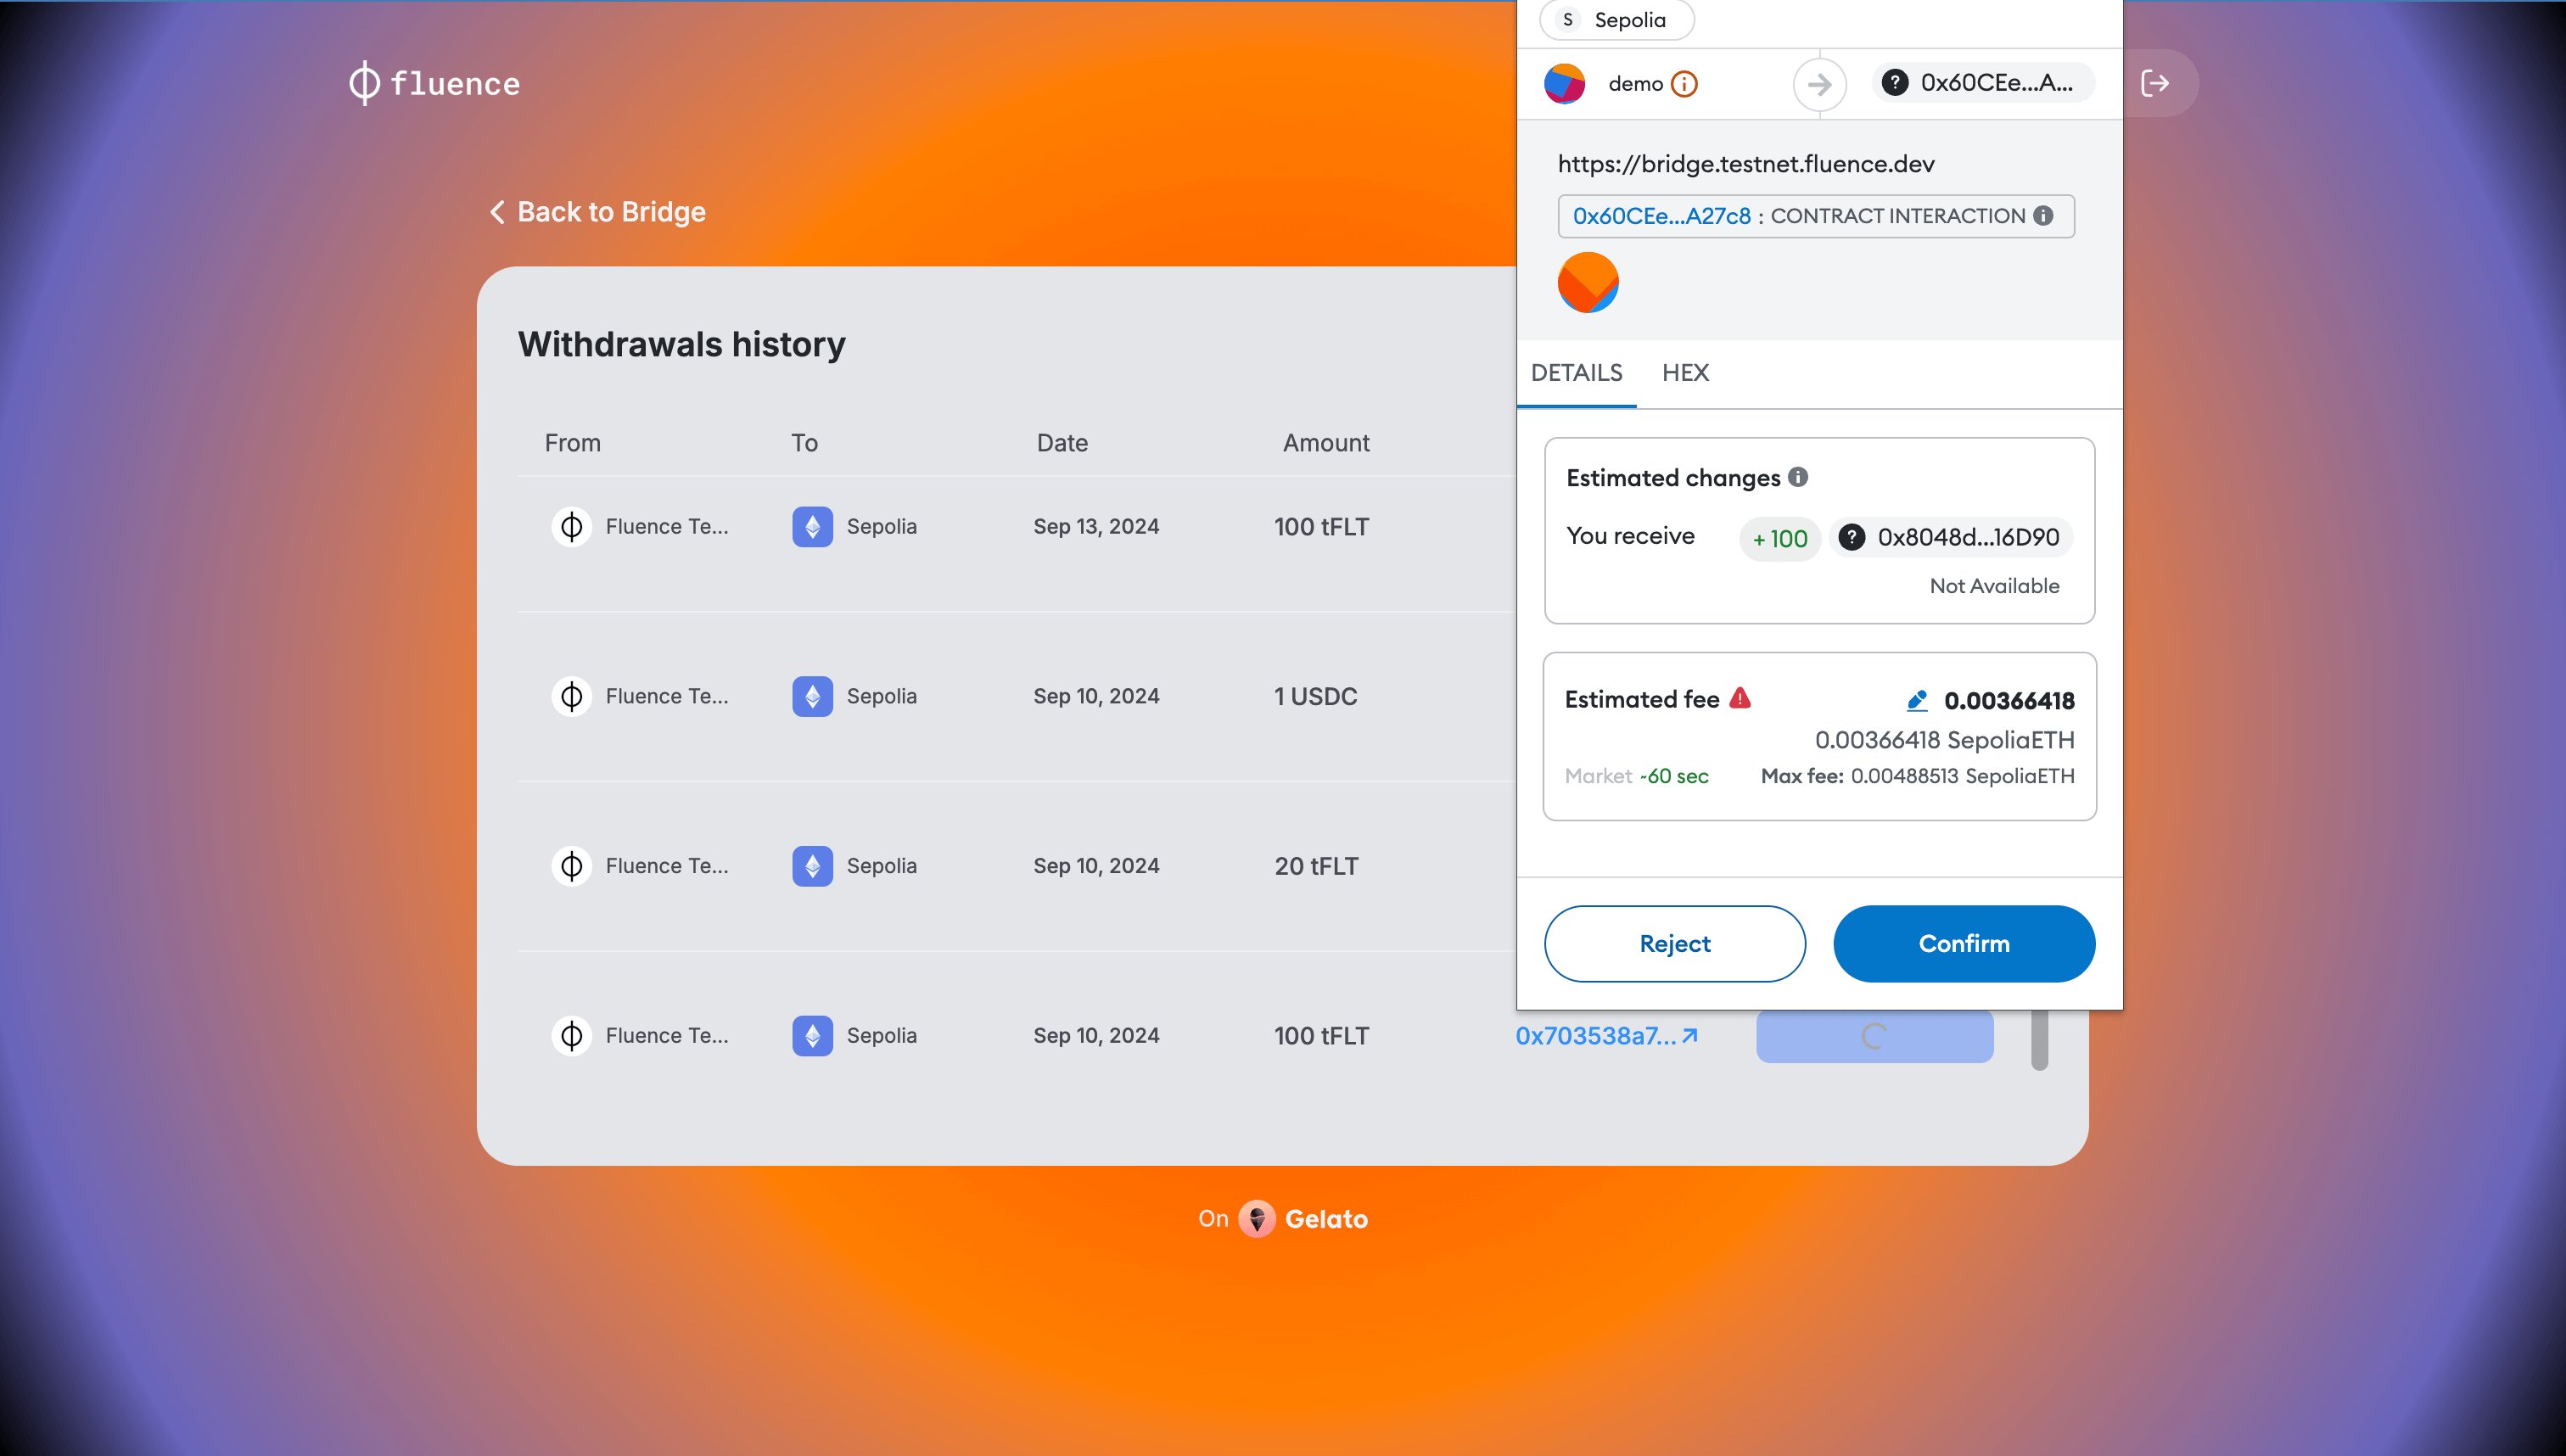
-
The withdrawal status will change to "Completed" and the funds transferred will be added to your wallet balance